As always, the first thing I asked to see was his portfolio of work, and I was truly impressed. Check out this before-and-after of a big farmhouse kitchen renovation he recently did. The before was "okay" but really dated... 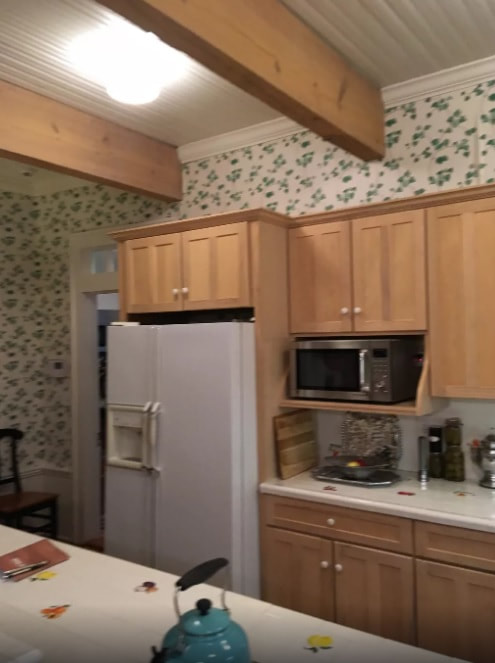 But the "after" was incredible! There were too many good pictures to choose from, so here are several. We'll start with a wide-angle view: 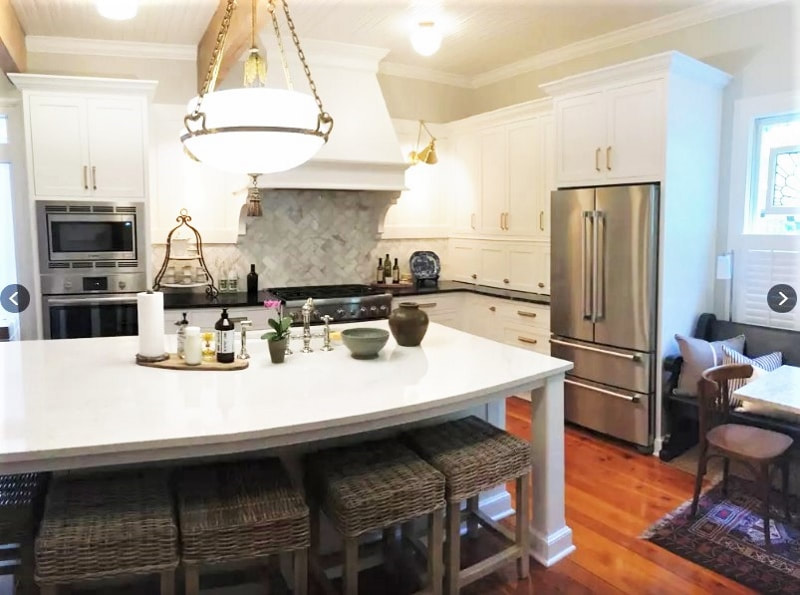 As you can see, lots of things were relocated, including the fridge. 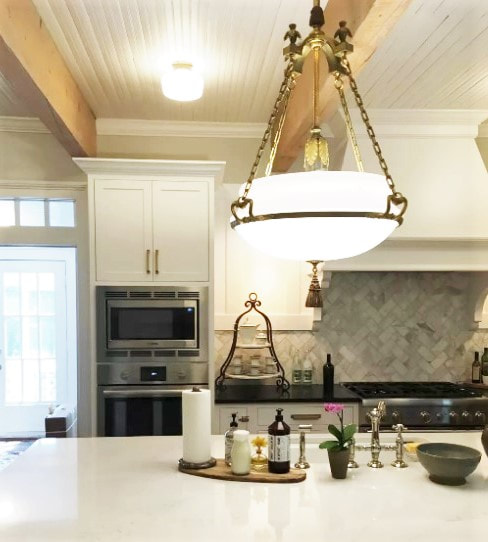 Check out the meticulous trim work on the cabinets and range hood.  And the dated old wallpaper has disappeared - either removed or well painted over. He also does decks, like this mahogany beauty with all of the fasteners hidden: 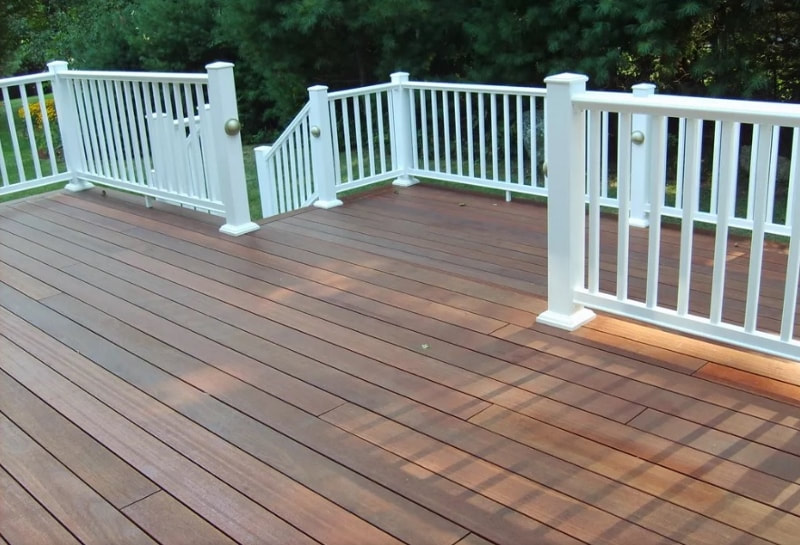 And dig the trim work on this staircase! Really nice. He has an aesthetic sense for good proportions which makes the difference between "so-so" and "outstanding" trim carpentry. 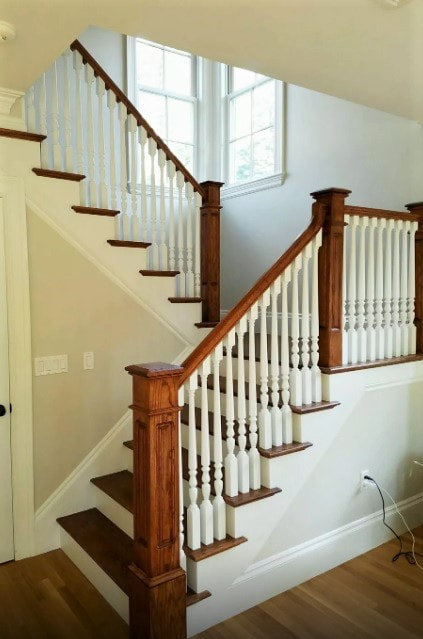 Of course, we did our due diligence as we always do before we add someone to our network. His references from former clients were glowing. In particular, they mentioned his great communication skills, and the way he always left the job site clean after each day of work. (That's really important in a kitchen reno!)
Sam rounds out our amazing team of local Asheville trim carpenters, and I think his kitchen remodel is one of the most meticulous I've seen around here. I'm really proud to be working with such a great network of people. So if you've got a deck or kitchen project that needs a thorough and experienced craftsman, please get in touch with us. We'll put you in touch with the right person for the job. Sometimes you have a vision for a centerpiece in your home that can't be accomplished with out-of-the-box cabinets from the hardware store. When that happens you might think of having custom cabinets made. But custom can be expensive, so here's a trick to save money: ask about semi-custom cabinets. Today I'll show you an example of a semi-custom job and how well it turned out. 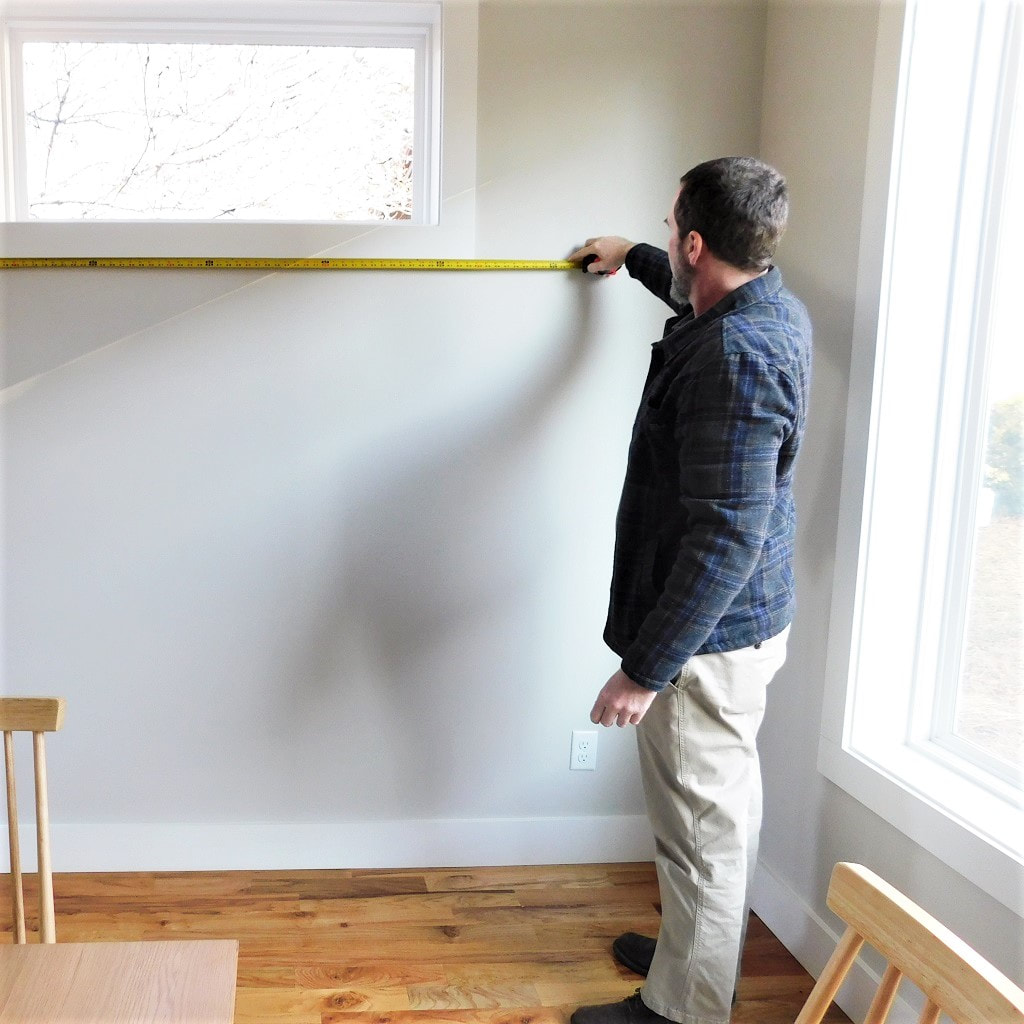 It started with a phone call from local interior designer Liz Hackett. One of her clients, a couple living in West Asheville, loves to entertain and wanted to create a cocktail bar in their dining room. After meeting to look at the space and review the project budget, we determined that a semi-custom project would be the best choice. We started with these cabinets from Lowes... 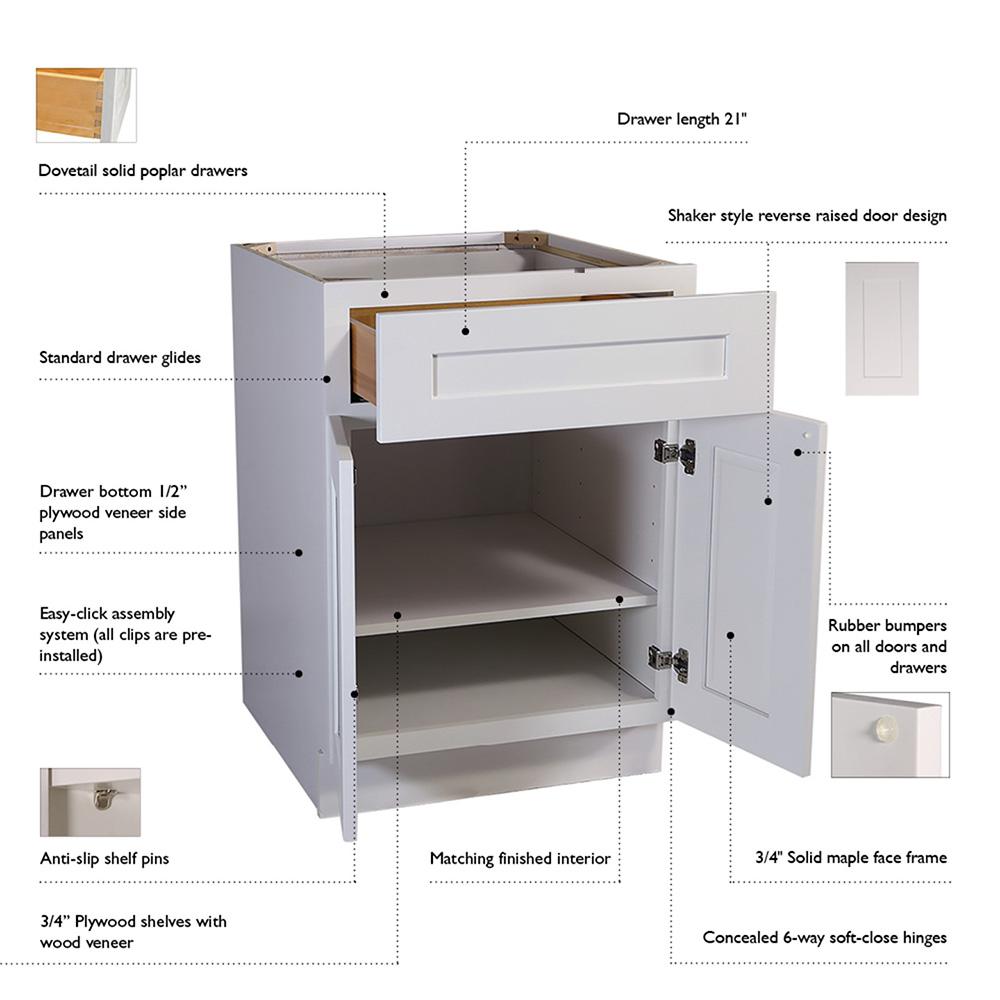 ...and then carefully considered them from all angles. They were very plain on the sides, and would look odd sticking out into the room like that, so we suggested adding end panels. Liz also wanted to incorporate a mini-fridge, so we designed an end panel to surround the fridge, too. 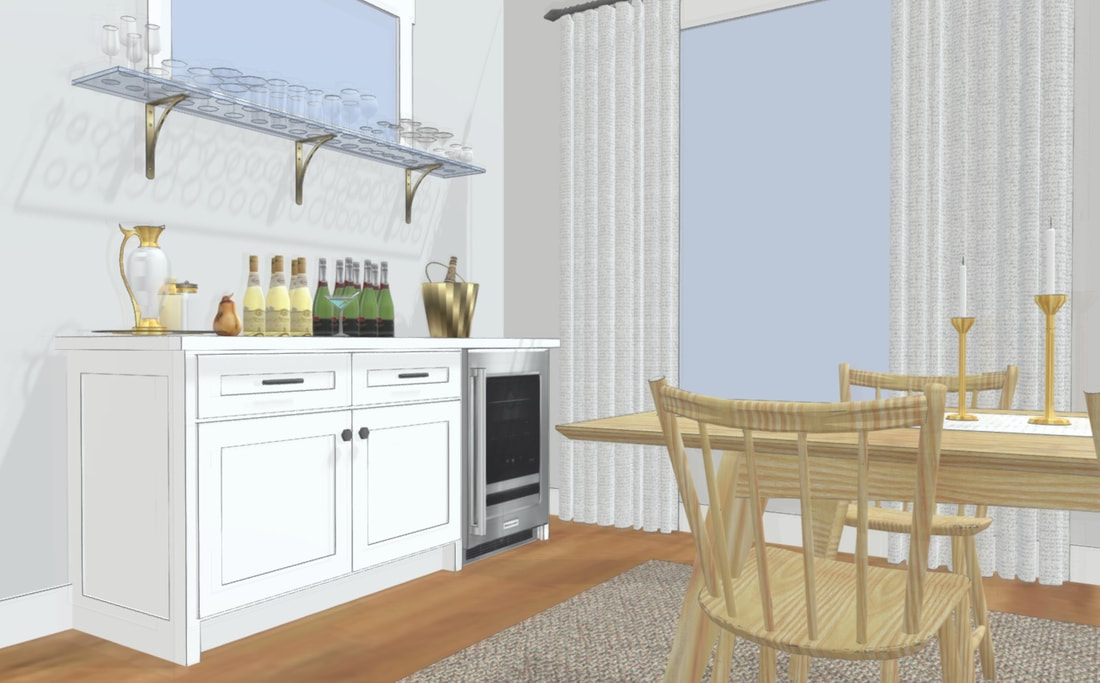 Once the cabinet arrived at our workshop, we got busy building and attaching the panels. 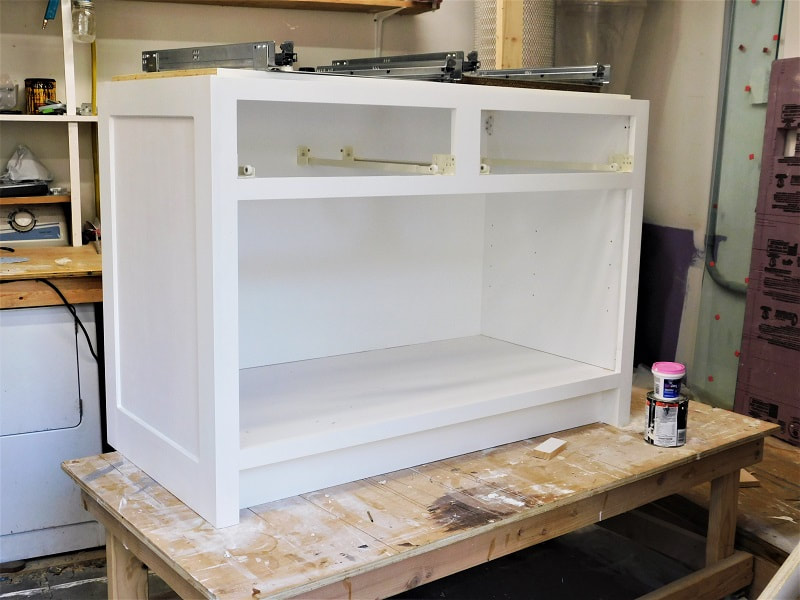 We also sourced custom pull-out drawers to make it easier to access the items in the cabinets. This is another advantage of semi-custom: the pull-outs wouldn't have worked in the stock cabinets. We had to add interior supports to attach them to. 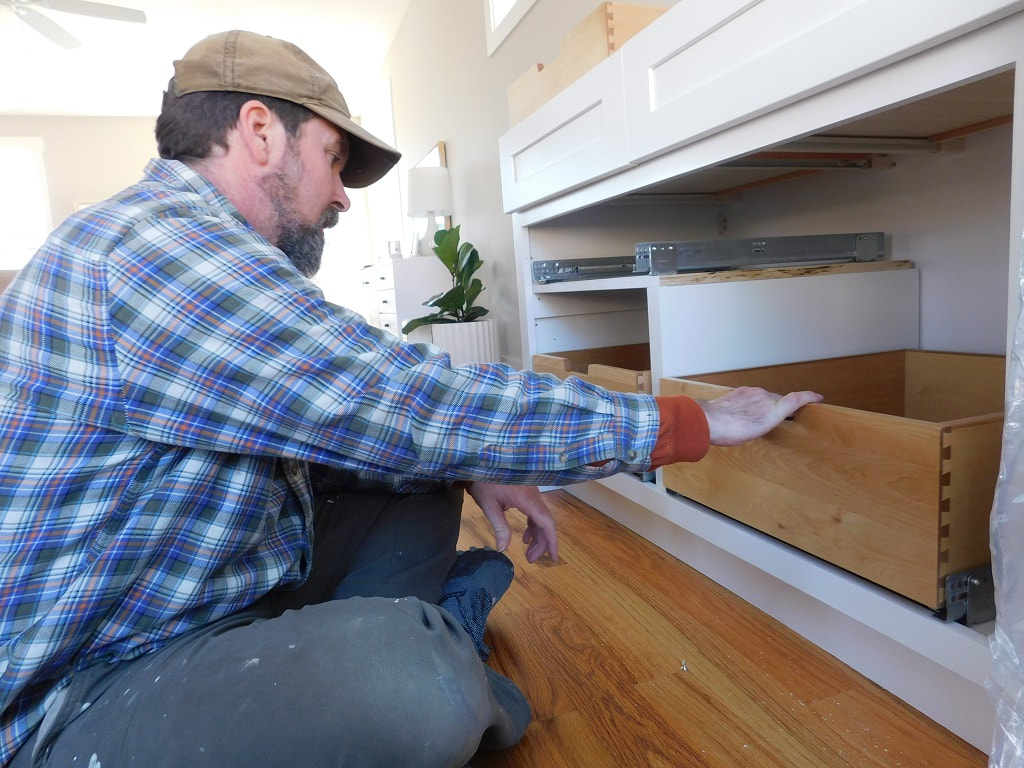 When we stepped back and snapped a photo, it looked a lot like our original drawing. (Except for the countertop, which was installed by another company.) 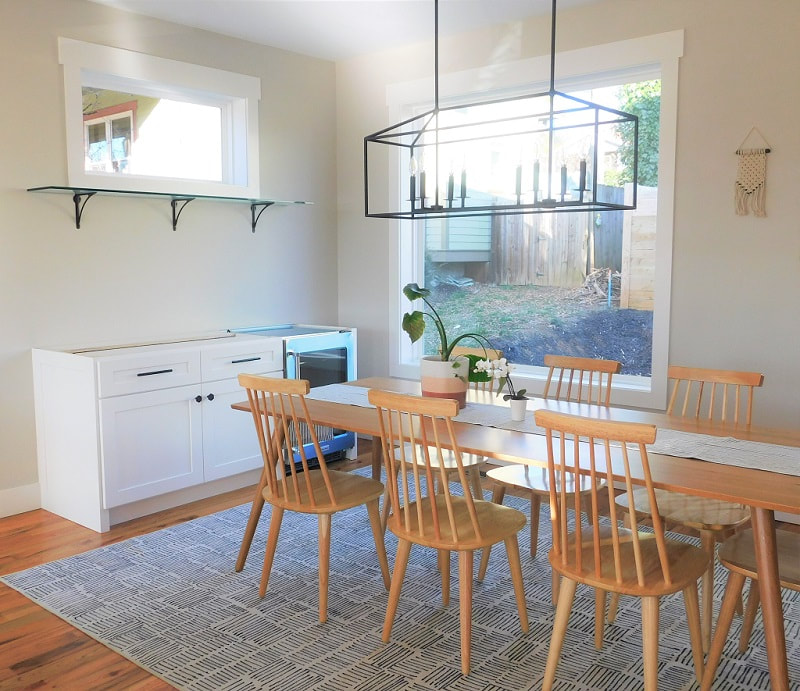 Liz's clients were thrilled with the way it turned out, and tagged us in their story on Instagram. 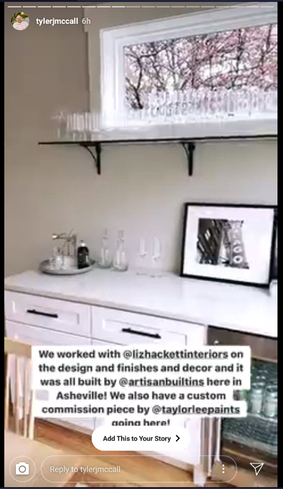 There are times when semi-custom cabinets won't work well. If the cabinet will be fit into a niche, it really does need to be custom built for the space, like on this project: 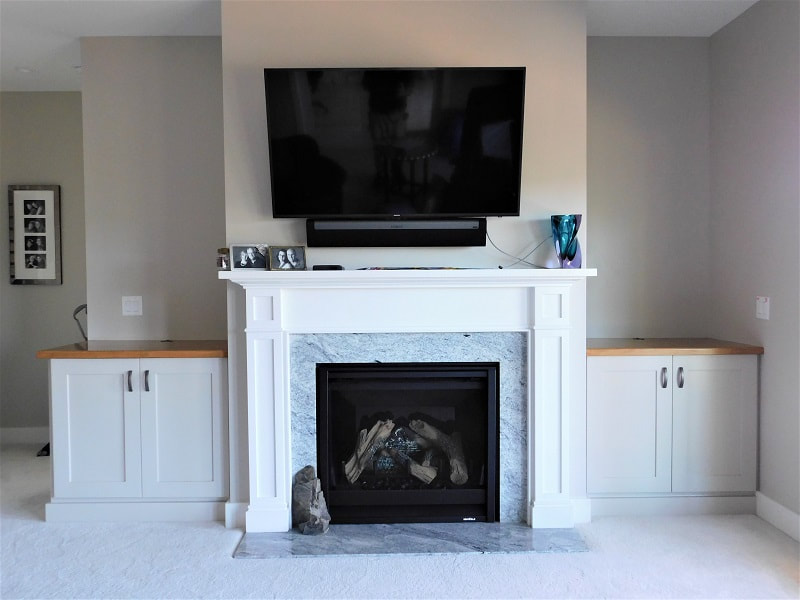 Semi-custom works best when the cabinet will be free-standing, like a kitchen island... 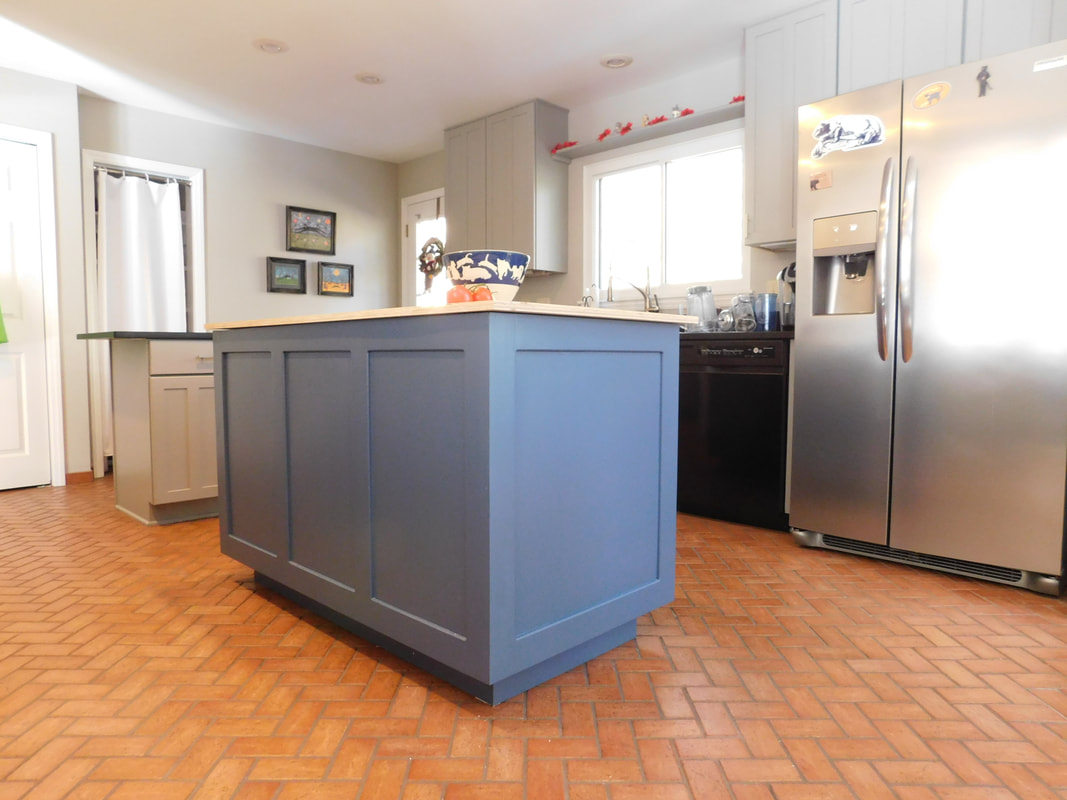 ...or placed up against the wall with three sides visible, like the dry bar we just showed off.
So if you've got a "custom" cabinet project, it may be possible to save a little on cost by doing a "semi custom" installation. All you have to do is click the big orange button and contact us to find out. Not long ago I had a customer who wanted to replace a big recessed can light with a more ordinary light fixture. Of course, she had the electrician come out first to remove the existing can light and install a box for the new fixture. But that left a big hole around the new box. 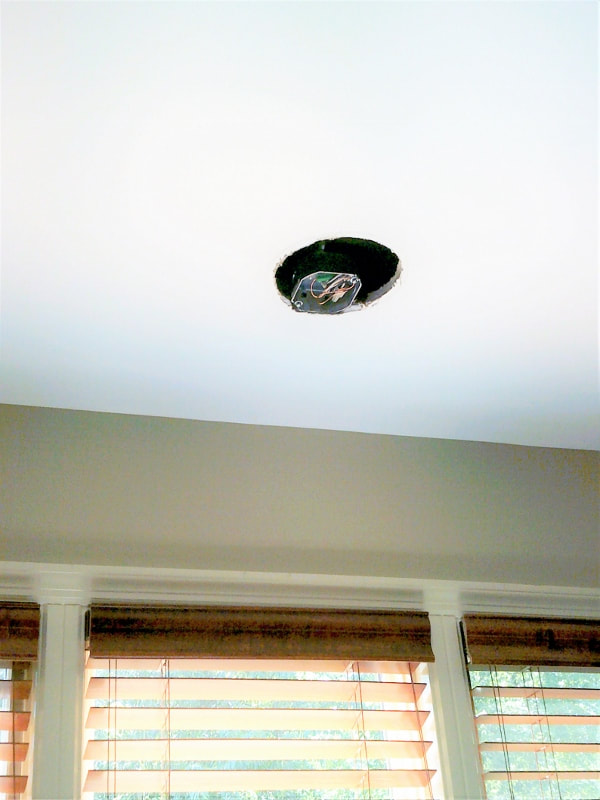 This is one of the more tricky drywall repairs because of course, you can't just fill in this hole with skim coat and be done with it! 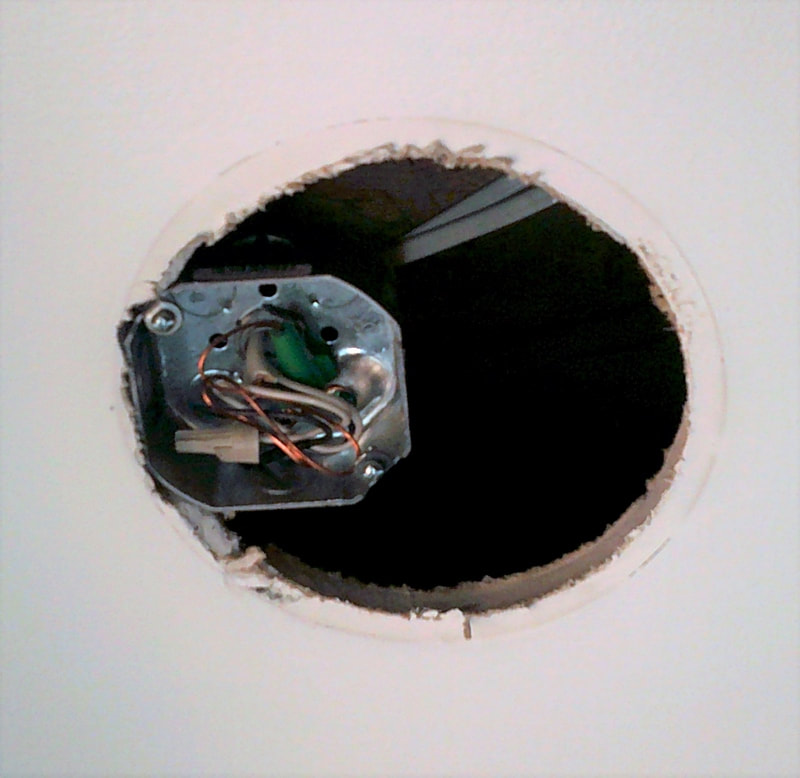 I started by adding a support made of thin wood which I screwed to the existing drywall. 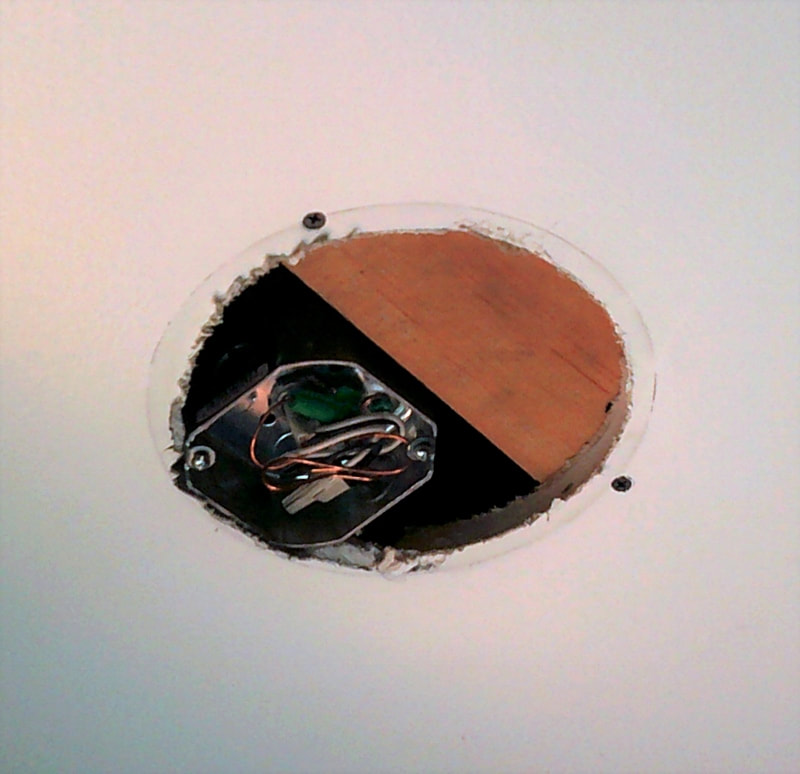 Then I added a custom-cut patch to fill in. My first patch was actually a bit small, and I soon realized I needed something with a little more coverage. 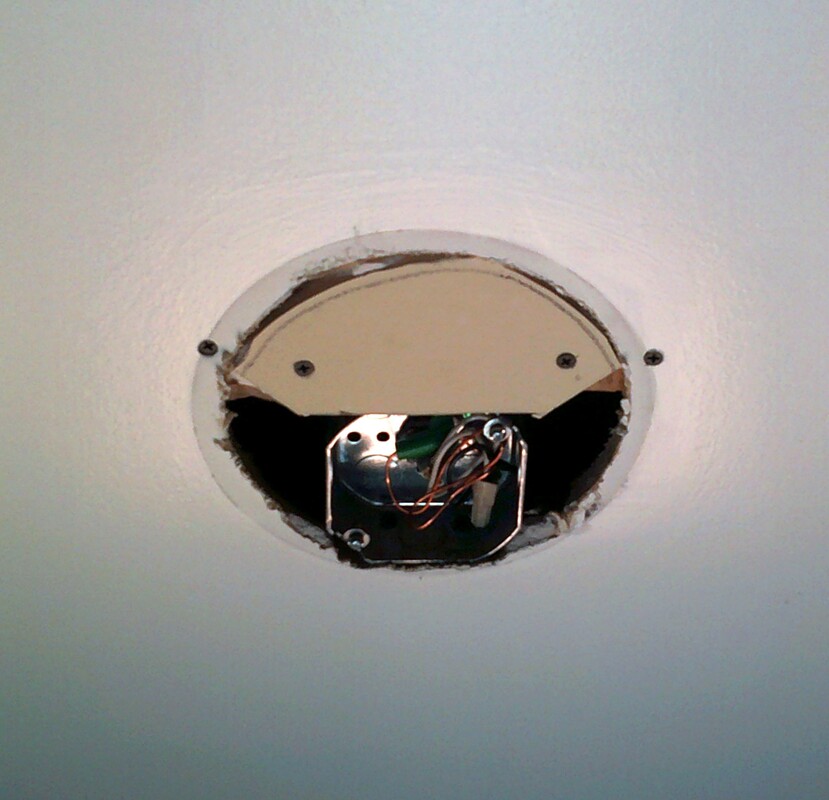 Wasn't there a spaceship in Star Wars shaped like this? 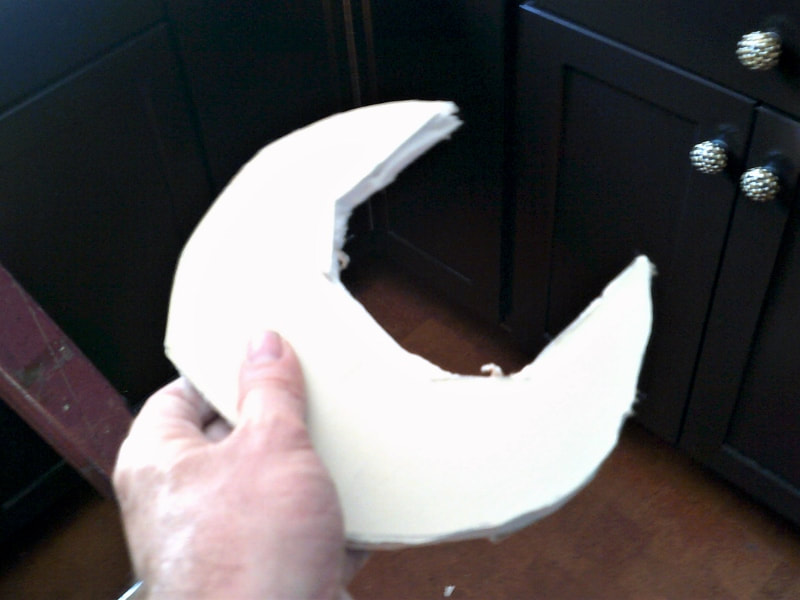 With my new patch installed my next step was to add a piece of screen. This will allow me to make a nice even skim coat, and it will give something for the mud to grab. It's serving the same purpose as the drywall tape you install on joints when you're finishing out a wall. 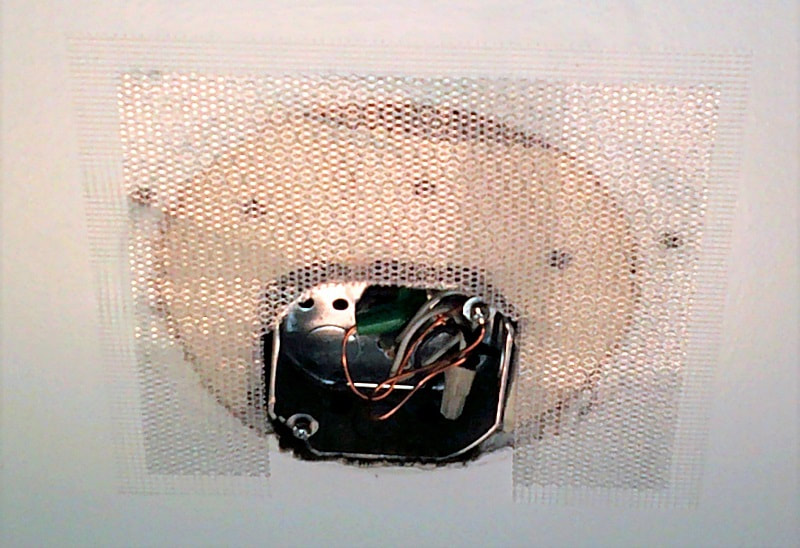 Then it was time for a couple coats of mud. By the way, if you ever do this yourself, don't try to get everything perfect on the first coat. Only the best of the best can do that; I've only met a few people with that level of skill in my life, and even with all my experience, I'm not one of them. The trick is to put down each layer fairly thin, and sand well between coats. 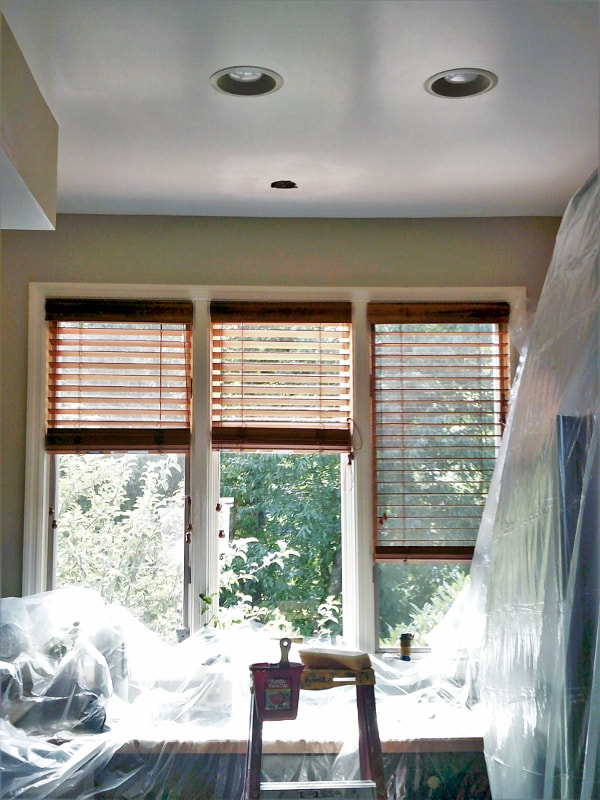 The last step was a little bit of touch-up by our interior painters to get it looking just perfect.
All in all, this is a fairly tricky drywall patch job to get right. This is one of those times you'll want to call in the pros. Luckily, that's what we're here for! This is one of those rewarding projects that brings a big return on a small investment. Many new homes in Asheville are built with places for shelving, but since since the builders are trying to stay on budget, the shelves are left out and the homeowner has to install them later. This is especially common in pantries and closets... or in this case, in the niches around the fireplace in my customer's living room. 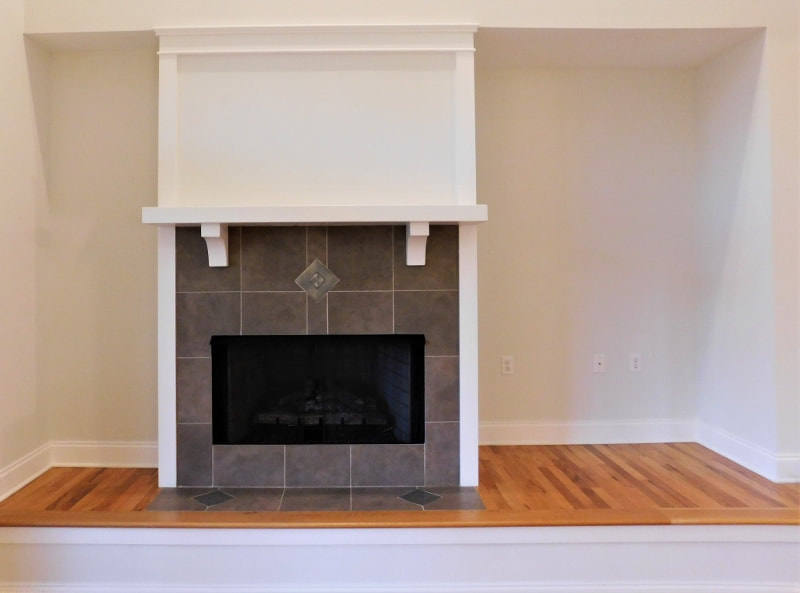 These little nooks were even more awkward than usual, because one nook was deeper and wider than the other, so the homeowner couldn't just pick out a matching pair of credenzas. We worked together to come up with a plan to install semi-floating shelves on each side, and by making the shelves the same height and thickness, we were able to create a sense of visual unity. Here's our "proof of concept" sketch. 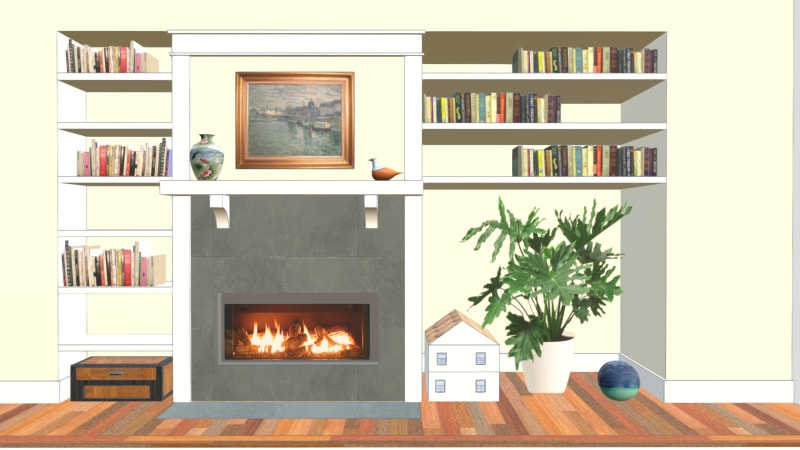 You may notice that there aren't any shelves on the lower right. The homeowner wanted a place to keep her daughter's large toys, and since she was considering selling the home in the future, she also wanted to leave a place for the next occupant to install a large TV. Once we had the size and spacing of the shelving worked out, I went to work behind the scenes in my shop.  The new shelves were painted to match the trim around the existing fireplace, so they looked like a natural extension of what was already there. 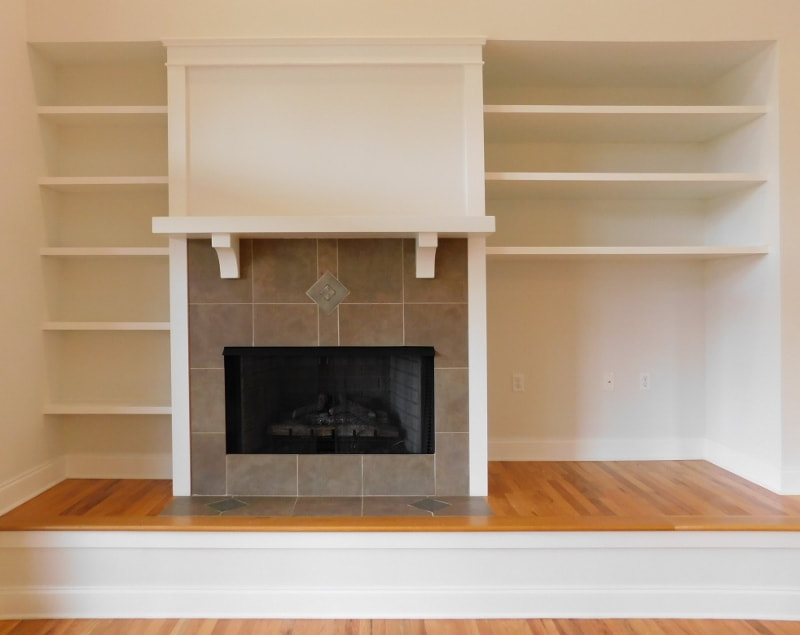 Even without books and accessories, the niches around the fireplaces have a much more unified look. 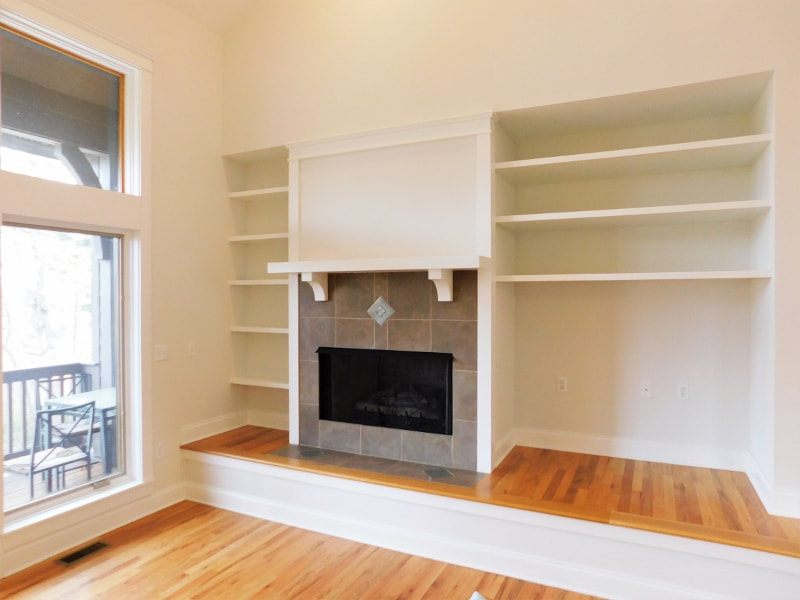 If you've got an awkward empty space that is crying out for cabinets or shelves, give us a call. We'll put in the pieces that the builder left out.
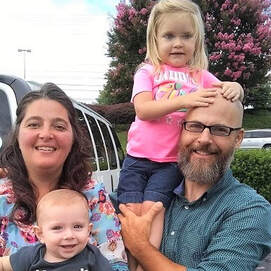
If you need someone to fix your screen porch, and you're near Asheville, I may have the perfect person for you. I went out to look at a job a few months ago and it turned out that the homeowners had a whole screened-in porch under their deck which was desperately in need of some TLC. For starters, the wind had gotten to the screen panels and they were belling out. You can really see it on the right-hand side of this picture. 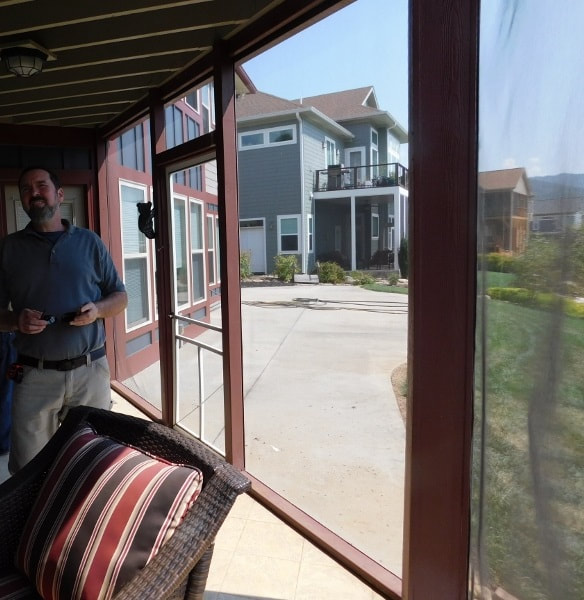 Even worse, the contractor who built the home had used untreated lumber for the screen frames, and they were starting to dry rot. 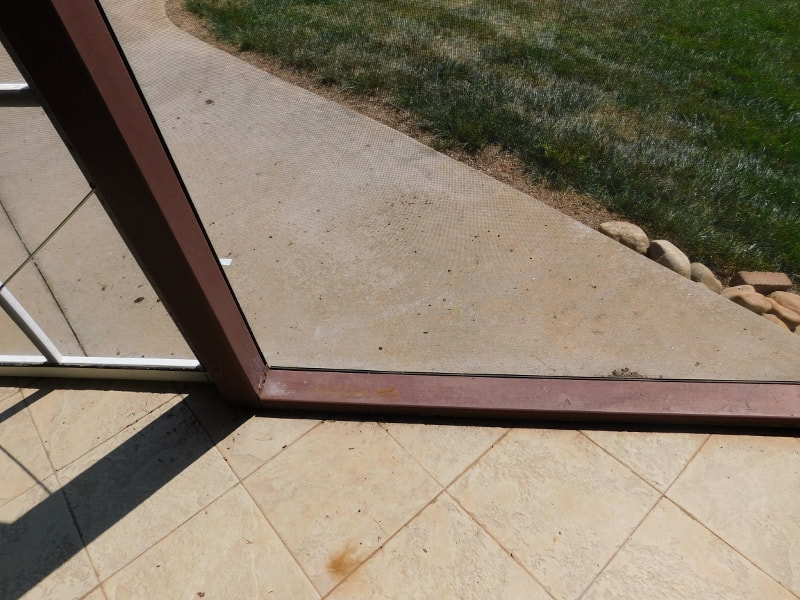 The outside also needed some attention. The homeowner wanted to fill in under the porch with Hardiplank ... 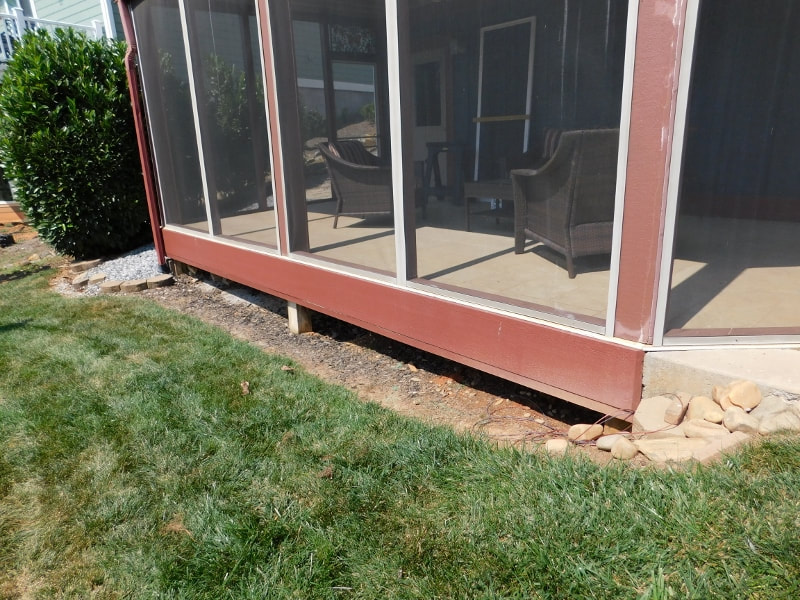 ... and part of the porch support was bowing out and needed to be fixed. 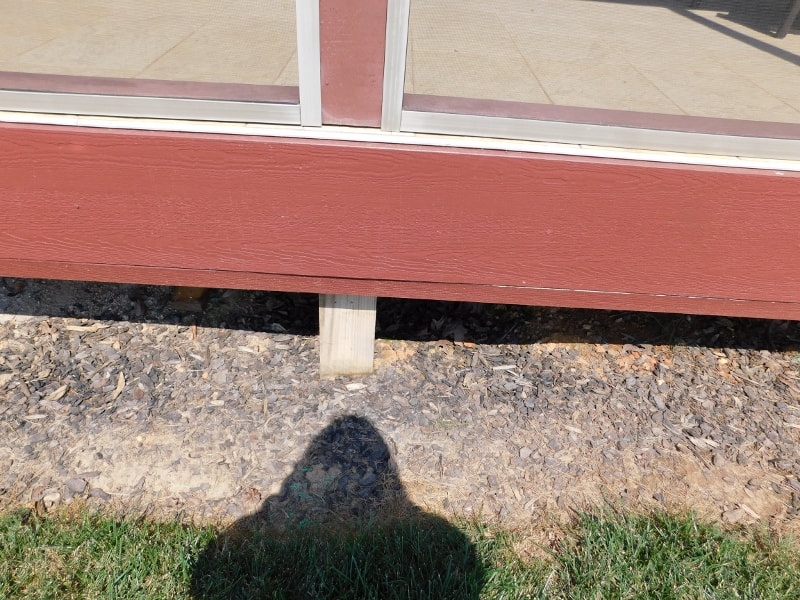 To make this job even more complicated, the access to the screen was blocked by a gutter, so it would be a quite trick to remove it without marring the gutter. Whoever put this porch up just wasn't thinking about long-term maintenance. 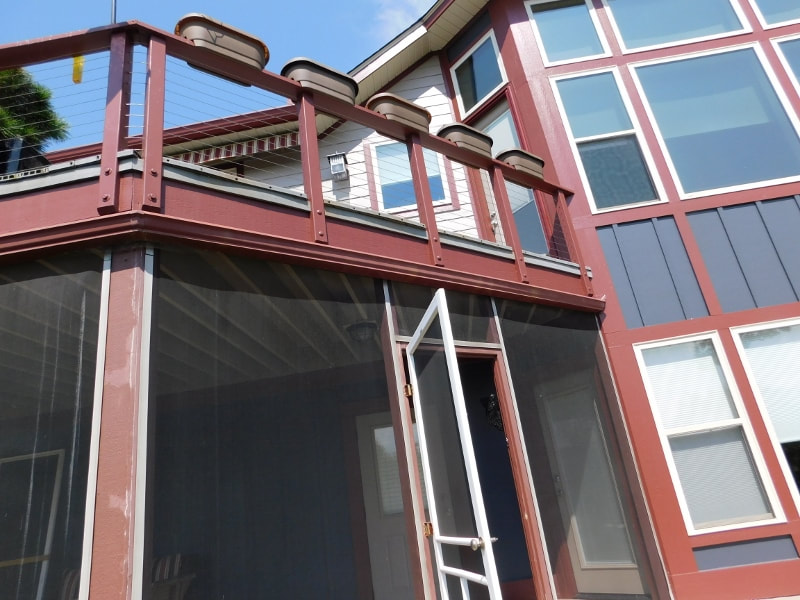 My schedule was chock-full at the time, and I couldn't fit in such a large job. So after checking with the homeowners, I called Jesse Scott, one of the handymen in our network, and asked him if he could take it on. (Here's a picture of him with his lovely wife Treva and their daughter Nora.)  Jesse hails from Florida, so he spent a large part of his career working on screened-in porches. In fact, he might be the best screen-stretcher in Asheville. (Is that a category in Mountain Express's "Best Of" issue? Somehow I doubt it. But if it were, I think Jesse would have the title.) Anyway, he did a great job on this porch, and he even sent us pictures when he was done. Here's the porch from the same angle as my first photo. That screen is as tight as a drum! 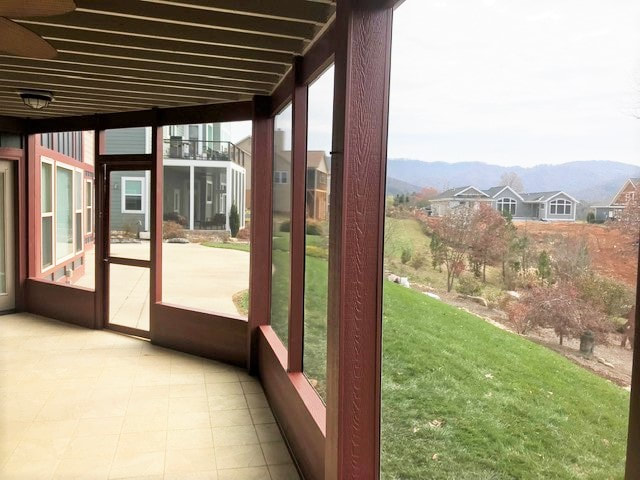 At the base of the porch, he added a low knee-wall at the homeowner's request. This was to keep their dogs from dashing straight through the screen in pursuit of a squirrel. 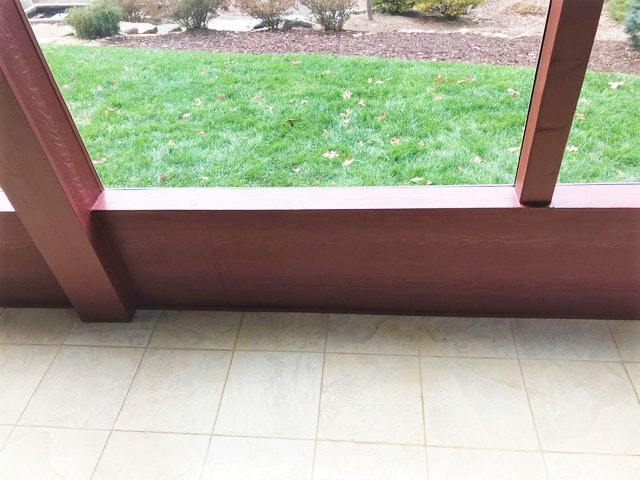 He also re-built the screen system so that the gutters won't get in the way if the mesh ever needs to be replaced again. And on the exterior, he filled in the bottom of the deck with long-lasting Hardiplank, repaired the bowed-out support, and repainted everything for a fresh look. 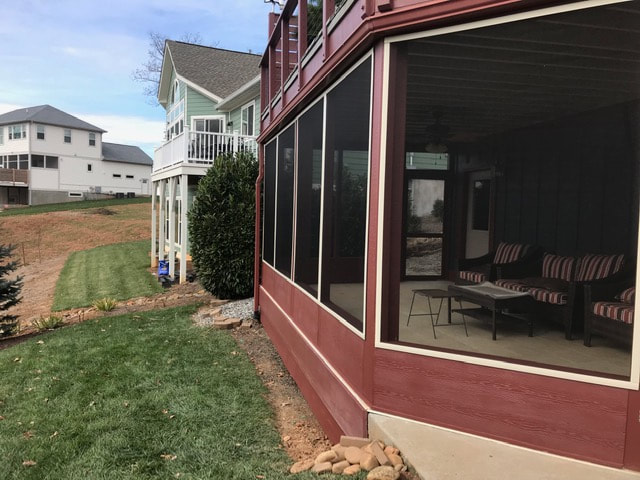 The end result is much more maintenance-friendly and looks really beautiful. 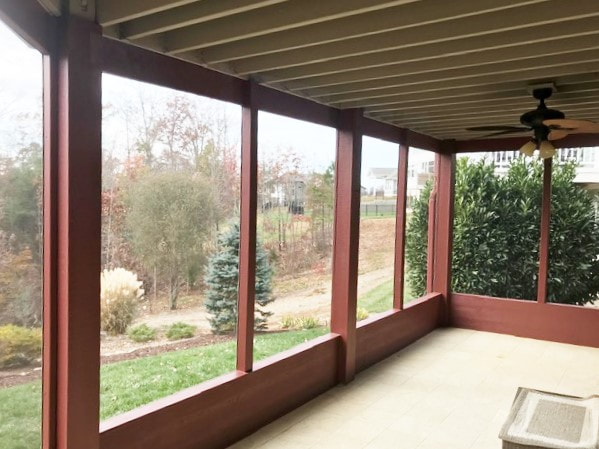 If your screen porch is looking a little tired and needs to be repaired, give us a call. We've got some seriously skilled screen stretchers standing by.
|
About

Welcome to my blog! This is a chronicle of the adventures of Arthur Teel, a handyman working in Asheville and Weaverville, NC. Need someone to fix your home?
Connect!
Archives
April 2022
This blog is for entertainment purposes only. See our Terms of Use for details.
|
The current turn-around time for our interior painting team is 2 weeks.
Our handyman team is currently fully scheduled and not taking new projects.
What Our Clients Are Saying
"Arthur is that rare professional handyman who is totally reliable; fairly priced; pro-active in communications; honest; punctual; skilled -- and a really nice guy." "Arthur is a great resource to have here in our area. He's prompt, professional, does great work and is cost effective. I'll definitely use him again!" |
Follow Us:Email US AT:Service Area:
In-town Asheville
Mars Hill and Weaverville Arden and Fletcher Fairview Popular Services |
|