|
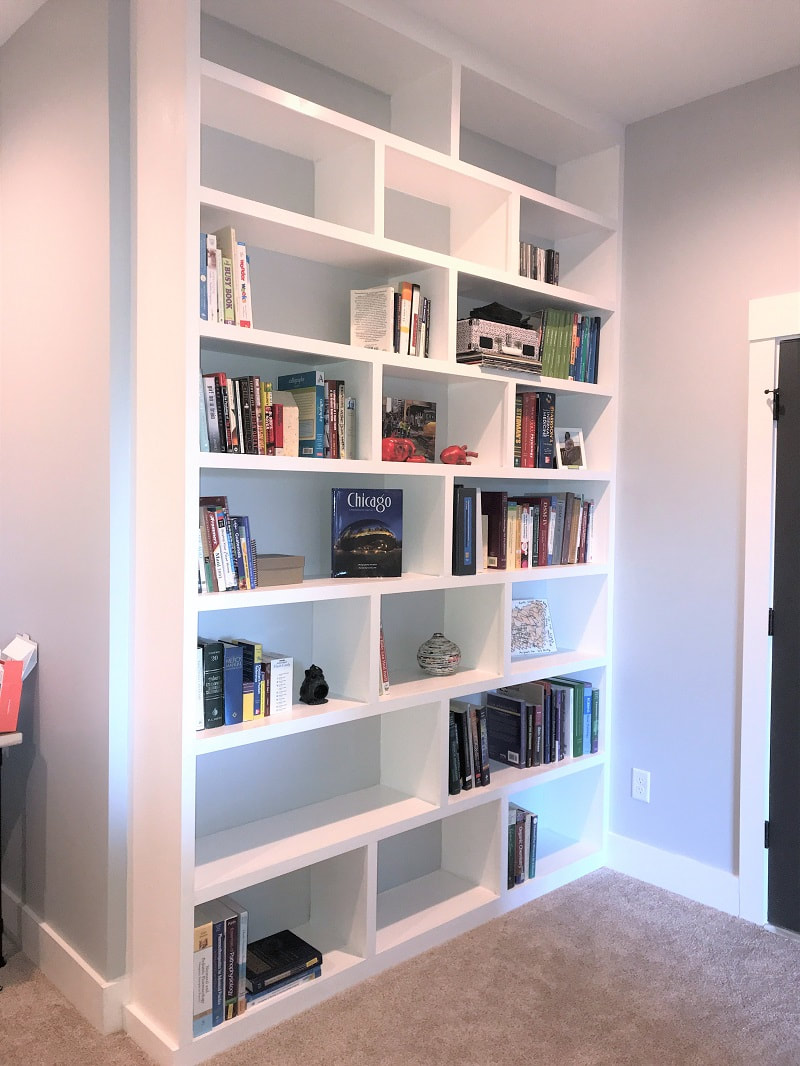
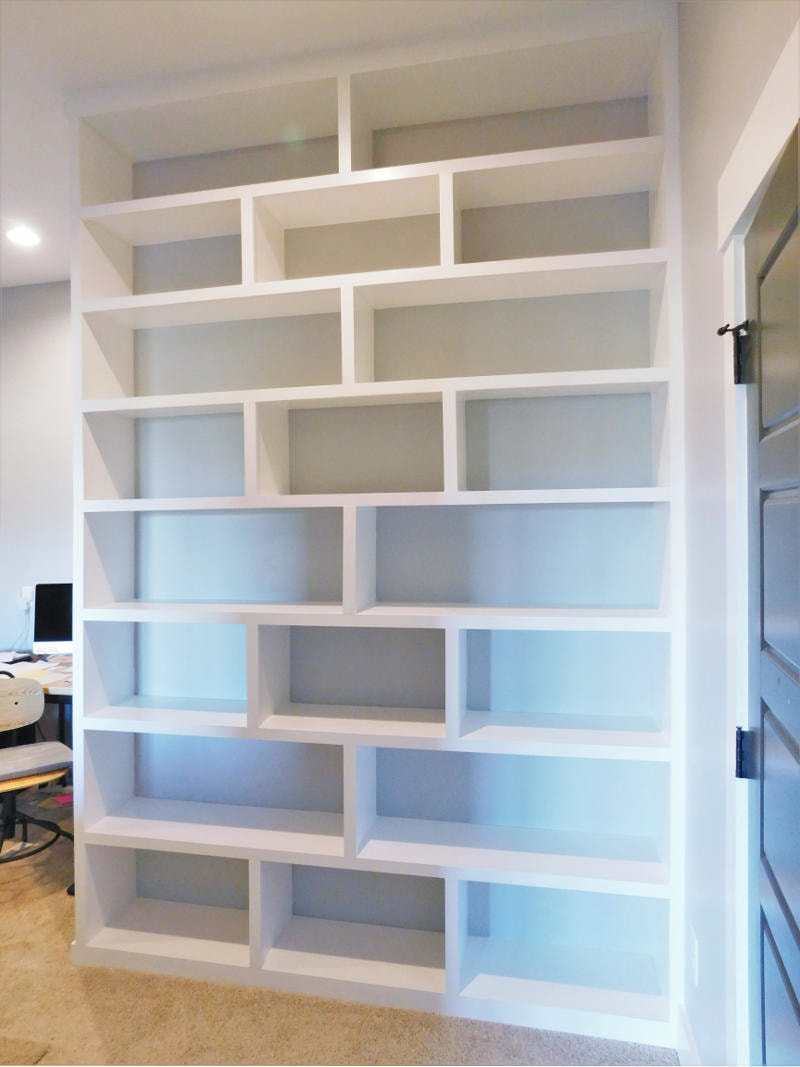
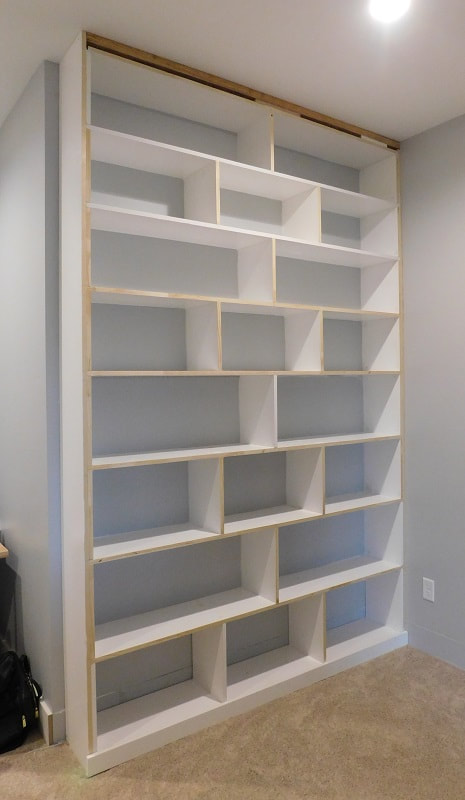
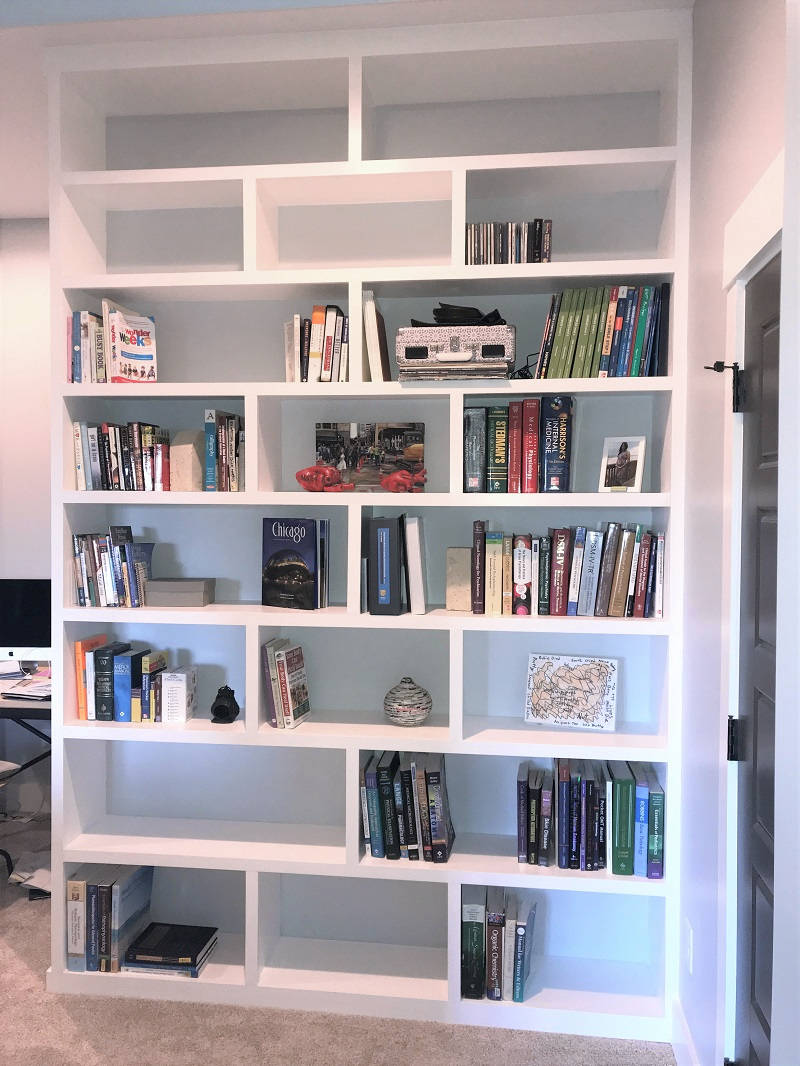
Several weeks ago, I installed a set off built-in bookshelves for one of my Asheville customers. They recently sent me a few photos of the shelves with books in them, which reminded me that I haven't shared them here yet! The shelves have a nice offset pattern:
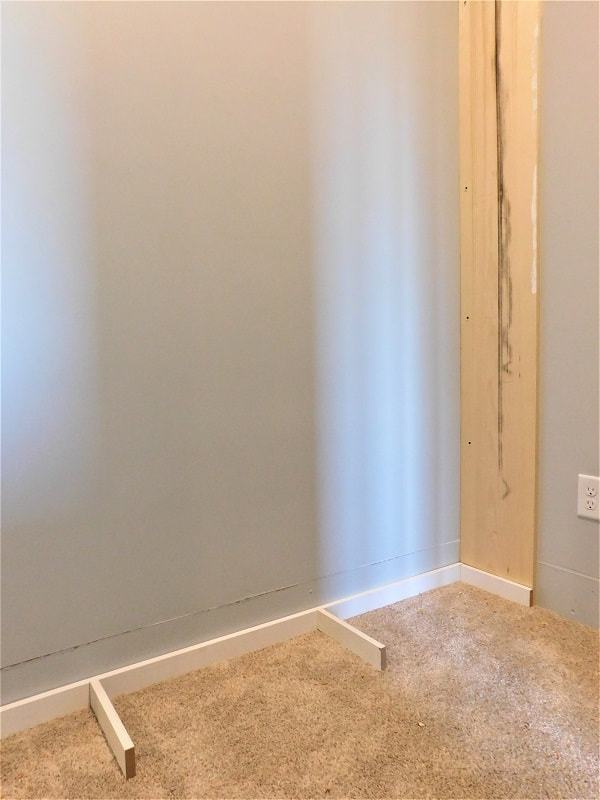
I started with a 2"x10" board which I lag-bolted to the ceiling joists. This ensured that the bookcase would never tip forward. (Normally I would also secure it to the wall behind, but this particular wall was made out of Styrofoam insulation board.) I also built a "foundation" at the bottom to support the heavy weight that these shelves will eventually bear.
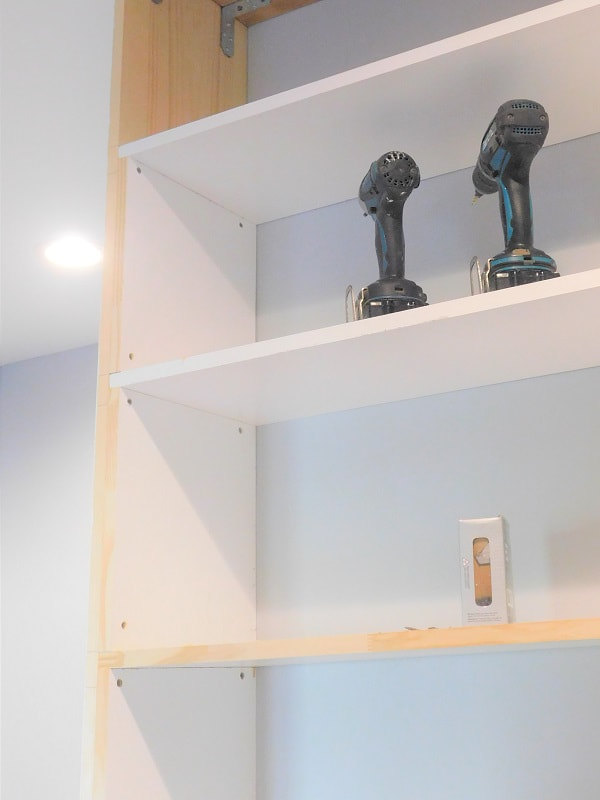
Next came the fun part: building the shelves. Naturally, I started at the bottom and worked my way up. The picture on the right-hand side (below) shows the structure of the bookcase. The sides are comprised of two parts:
I really like this layout because I can add lots of supportive structure which can all be hidden by face framing. It all comes together in a very tight fit.
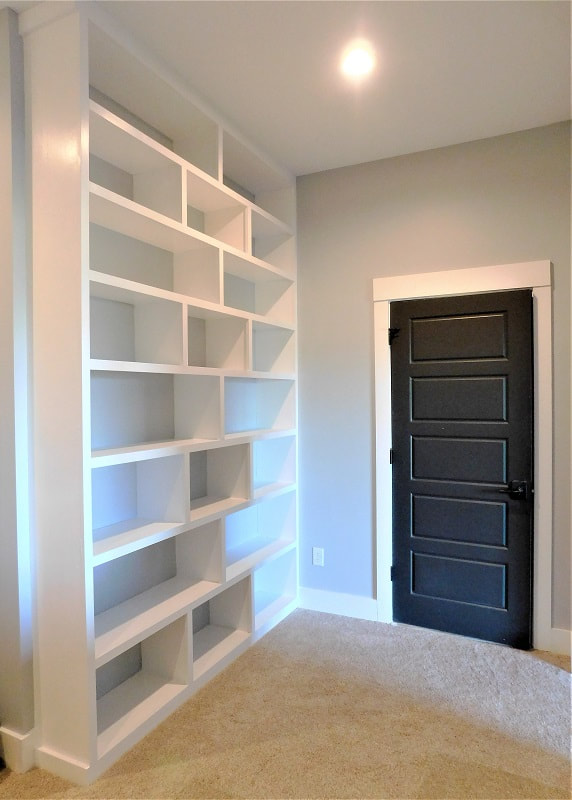
"Face framing" is exactly what it sounds like: wooden strips which go on the front of the frame. They make the shelves look thicker, and they also make them stronger.
There was also QUITE a bit of painting on this project, and it was very tricky, because the wall was a different color than the shelves. Normally I would have put a backing on the shelves to make the painting simpler, but this room was very small, and it would have been hard to bring it in as one piece. Of course I pre-painted the boards before installation, but they always need another coat once it's all put together. I had to borrow my wife's artist brushes to get into all the little corners. But it turned out very well. The customer even left a great review on Google.
If you're interested in getting your own custom built-in furniture, check out my online furniture portfolio at www.ArtisanBuiltins.com. Or you can still contact me in the usual way, and I'll be glad to assist you.
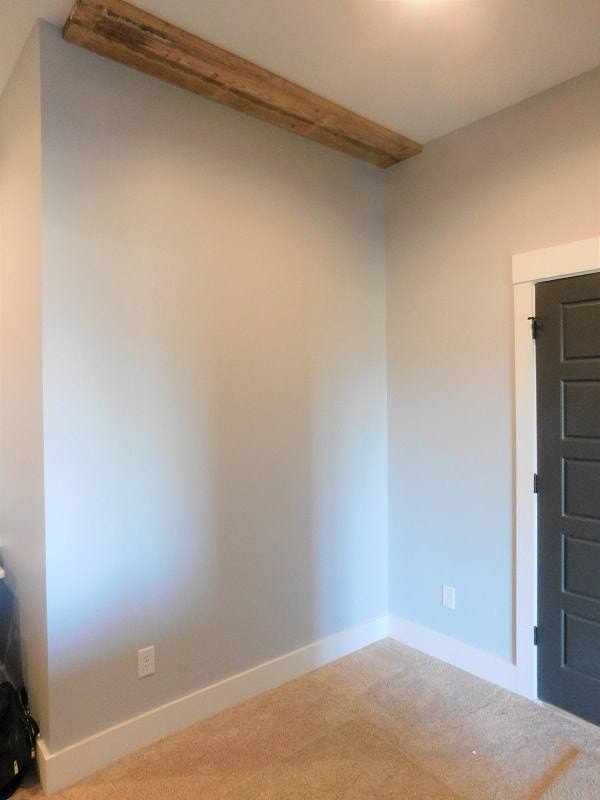
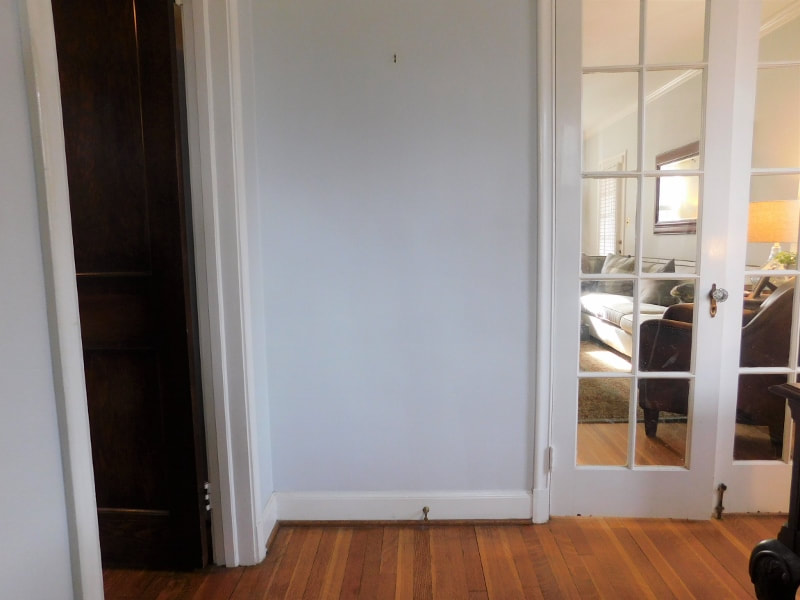
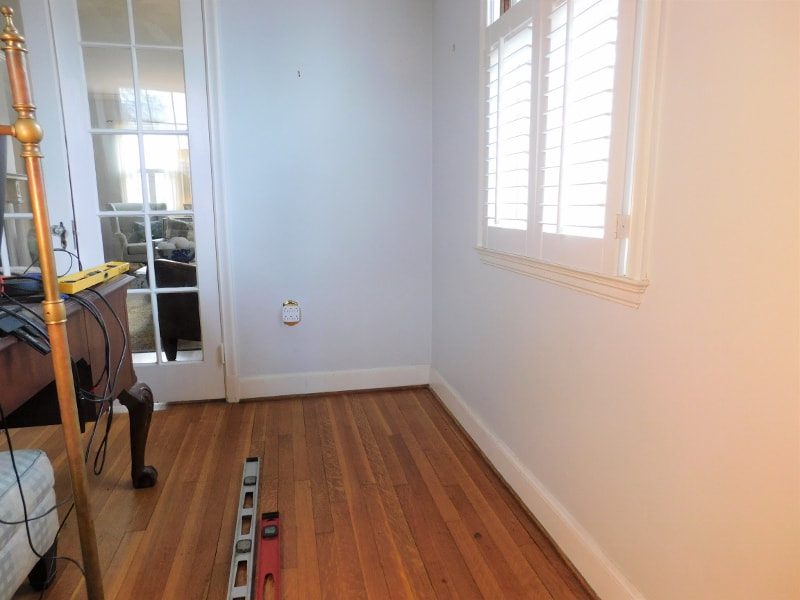
 I can't resist showing the "After" first! I just finished a fun project in north Asheville's historic Grove Park neighborhood: installing new wainscot and chair rail in a home office. We started out with a blank canvas: the room had nice white trim and French doors, but there was plenty of room for architectural interest.
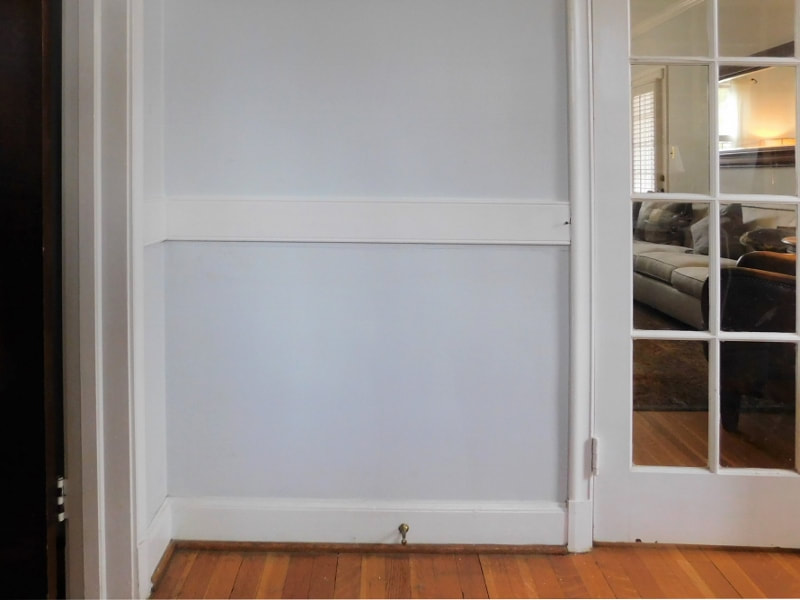
I started off by installing a chair railing, which is nice in an office or dining room because it protects the wall from nicks and dings caused by the backs of chairs. The homeowner requested a two-piece railing built up from pre-milled, pre-painted trim.
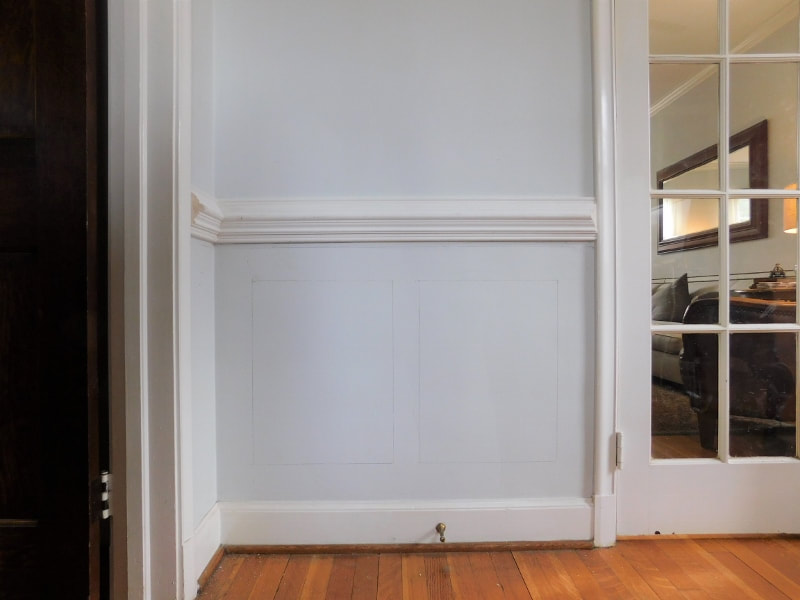
If you look closely at the right-hand photo, you can also see that I've penciled in the lines for the wainscoting. Then I installed squares of moulding directly on the wall. Using the existing wall (instead of adding a wooden backing) makes a significant cost savings.
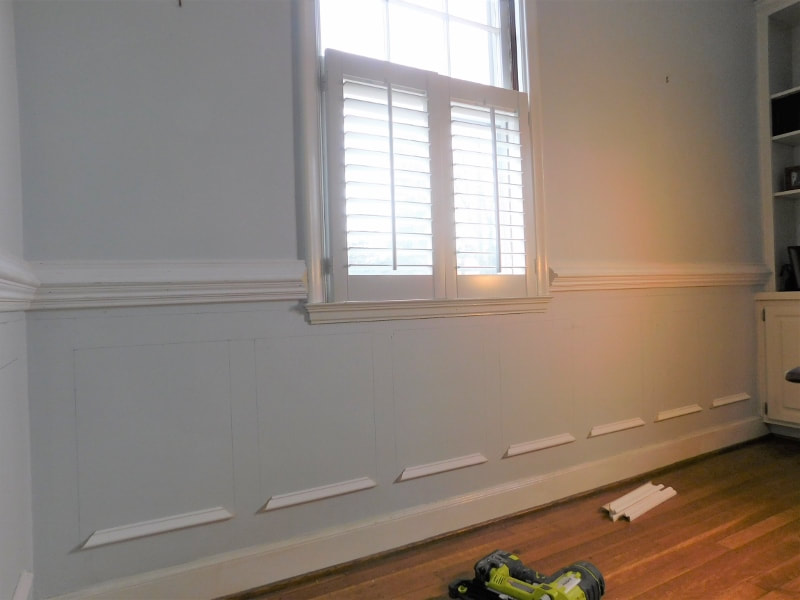
Wow! What a big difference this trim makes! It looks like something you'd see in the White House, and it's perfectly suited to this historic home. 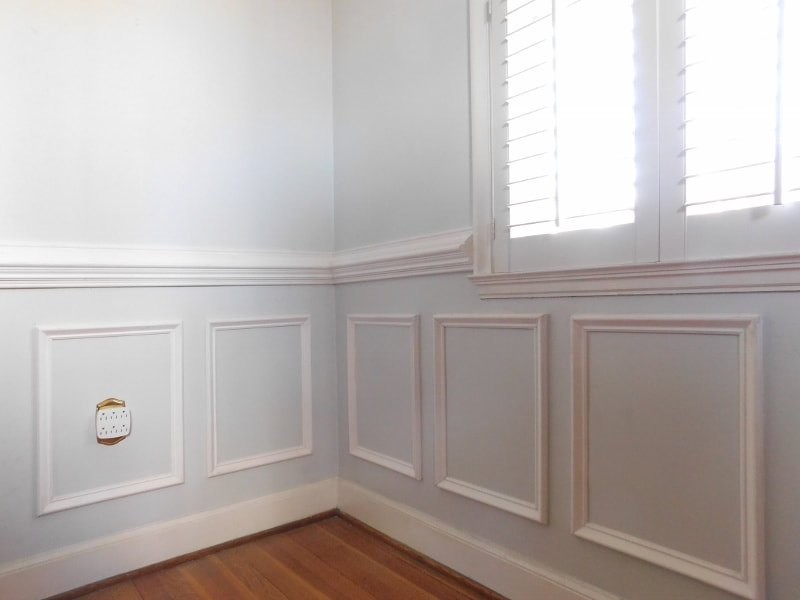 Interestingly, the cost difference to install the two piece chair rail (as opposed to the generic standard) was very minor, and it is much more elegant than the plain piece would have been.  Wainscoting like this could be what sets your home apart from the "plain white box" construction that we see in so many modern houses. If you have a room that needs a little dressing up, get in touch with us. We'll be glad to help.
|
About
Welcome to my blog! This is a chronicle of the adventures of Arthur Teel, a handyman working in Asheville and Weaverville, NC. Need someone to fix your home?
Connect!
Archives
April 2022
This blog is for entertainment purposes only. See our Terms of Use for details.
|


The current turn-around time for our interior painting team is 2 weeks.
Our handyman team is currently fully scheduled and not taking new projects.
What Our Clients Are Saying
"Arthur is that rare professional handyman who is totally reliable; fairly priced; pro-active in communications; honest; punctual; skilled -- and a really nice guy." "Arthur is a great resource to have here in our area. He's prompt, professional, does great work and is cost effective. I'll definitely use him again!" |
Follow Us:Email US AT:Service Area:
In-town Asheville
Mars Hill and Weaverville Arden and Fletcher Fairview Popular Services |
|