|
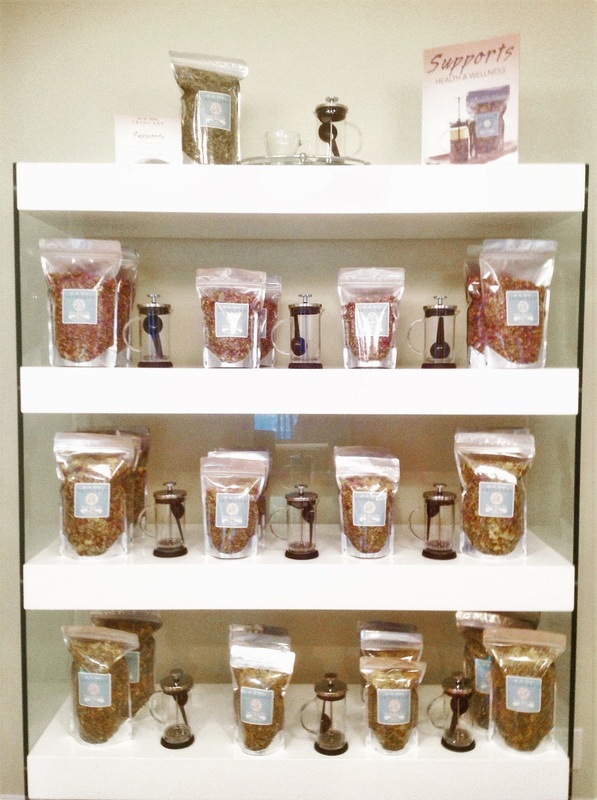
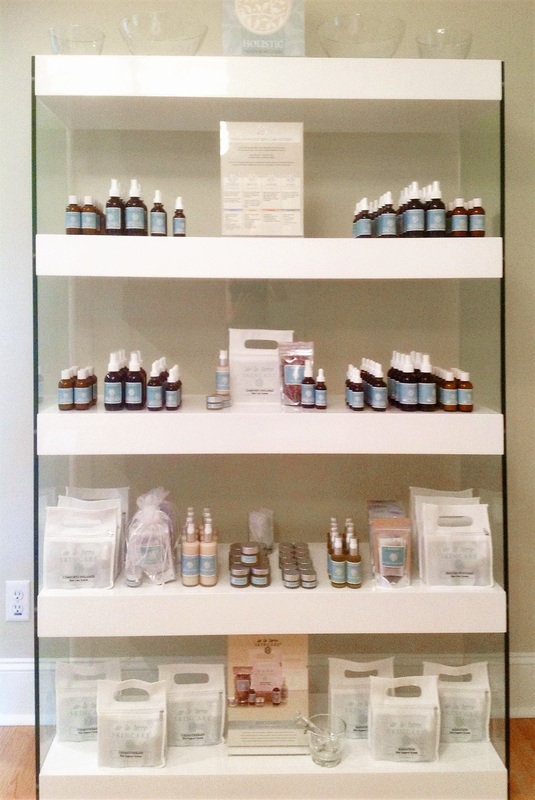
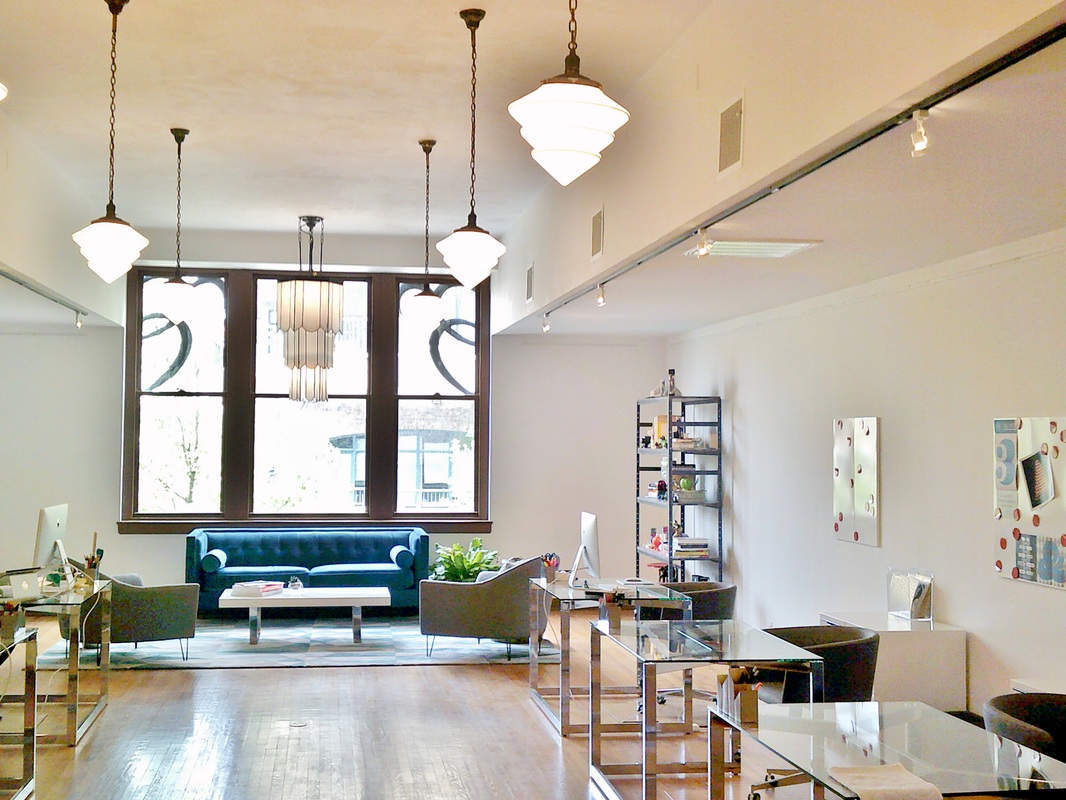
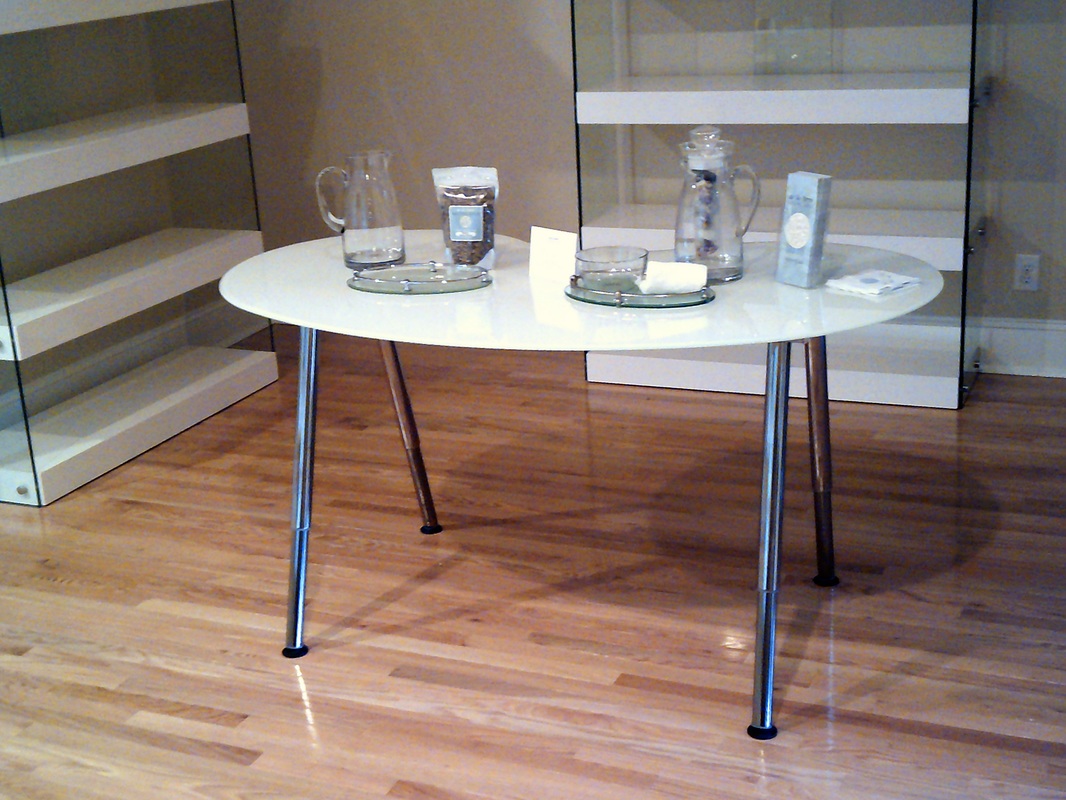
Yesterday I showed off some pics of the furniture assembly which I recently did for Anne Willis at De La Terre Skincare. She saw the blog and sent some updated pictures. The room still looks great, and as you can see, her skincare products look great on the new shelving.
 Thanks for sharing, Anne! I can help you make your office beautiful, too. Call me today for interior painting, furniture assembly and more. Keep Reading
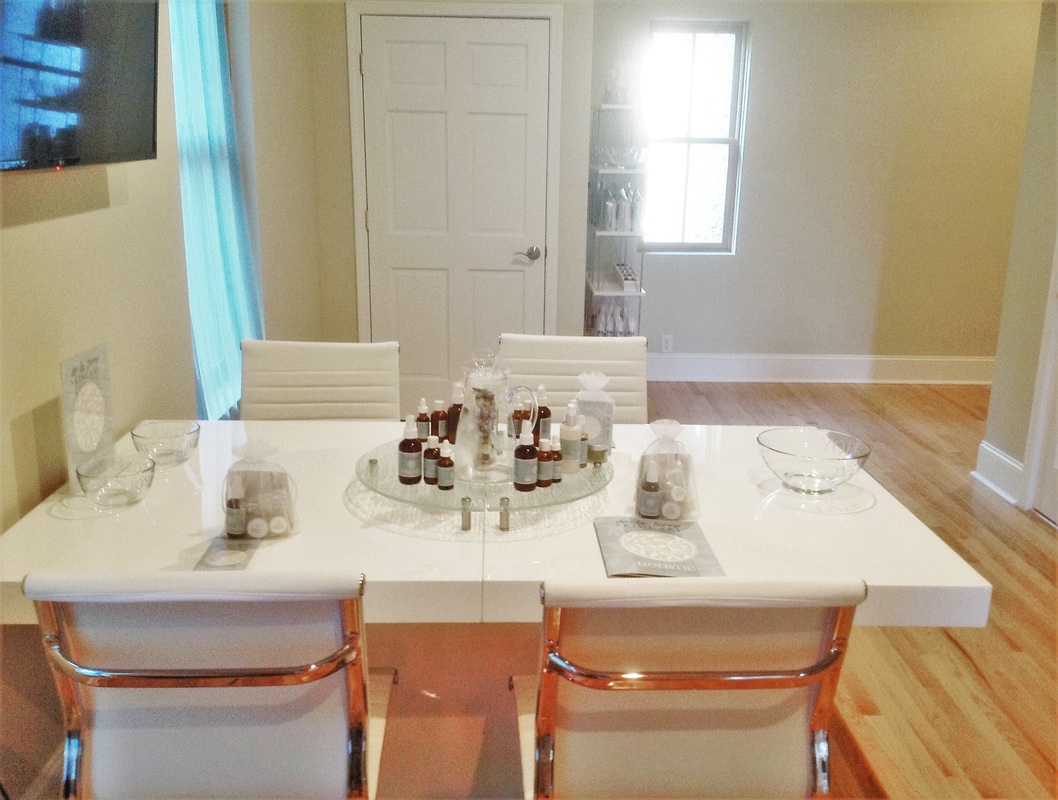
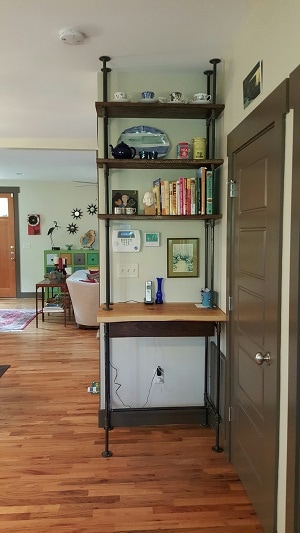
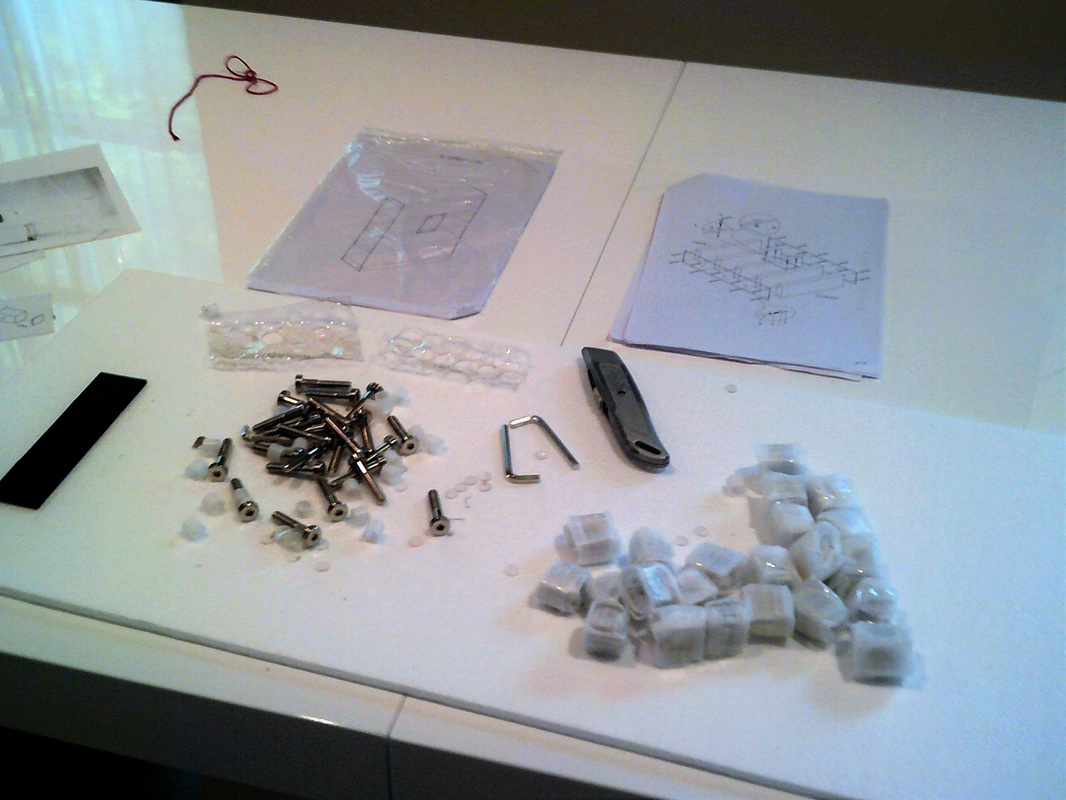
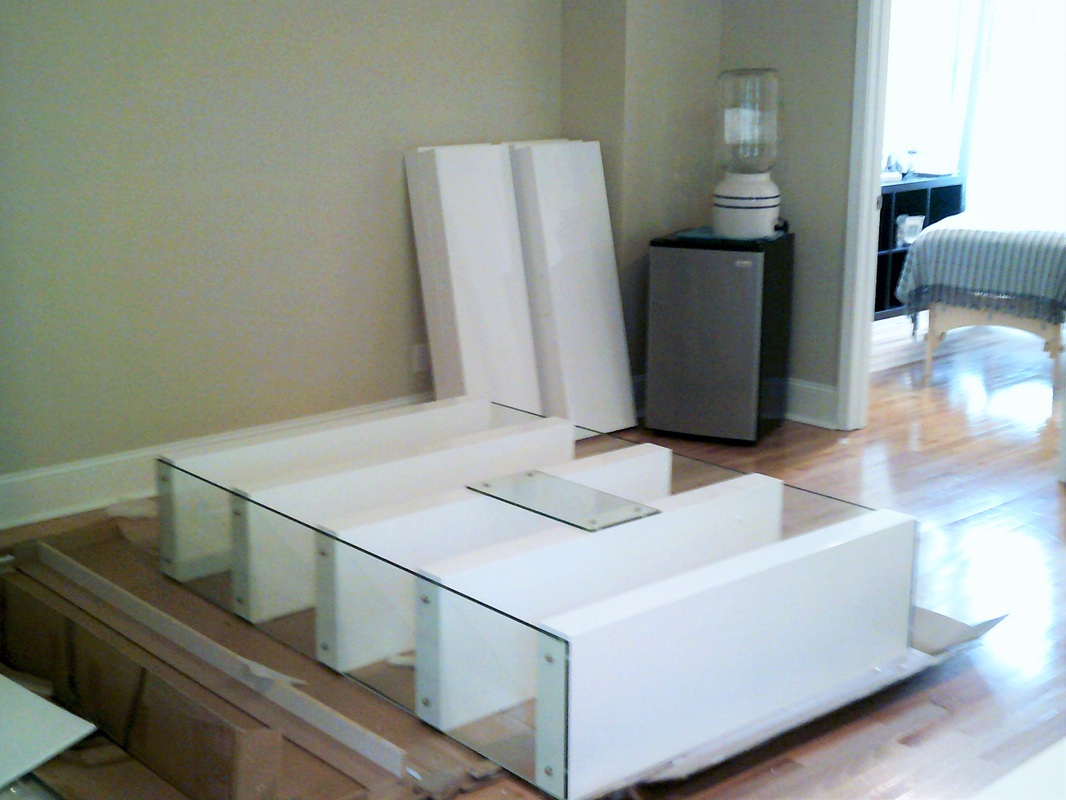
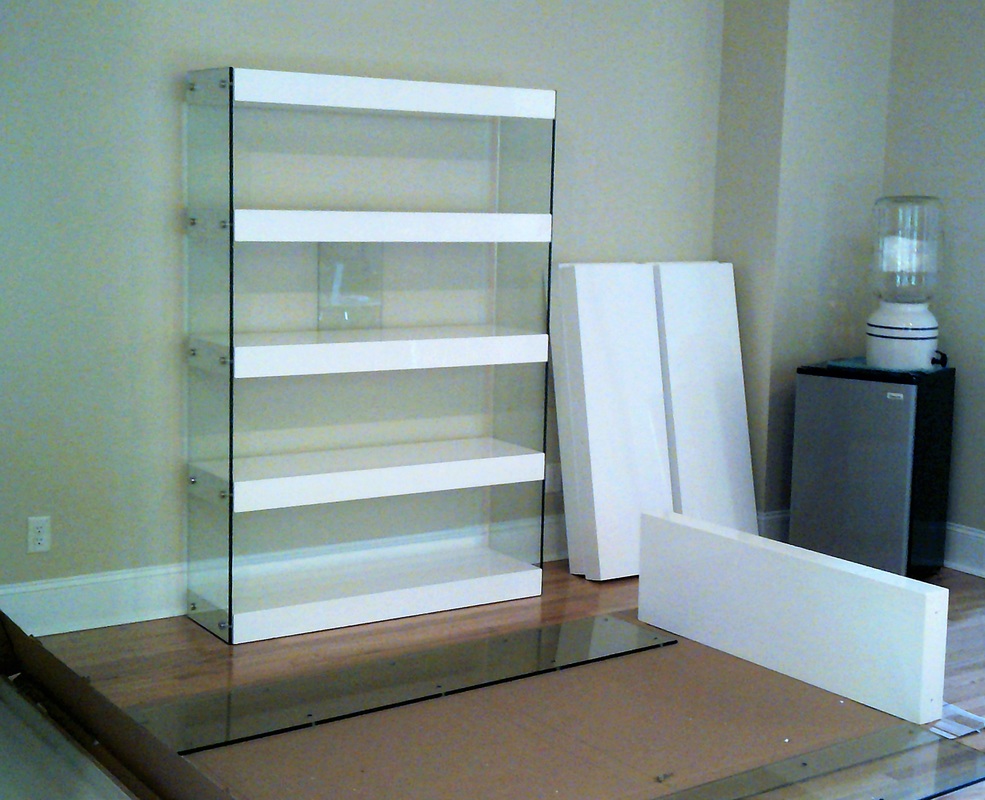
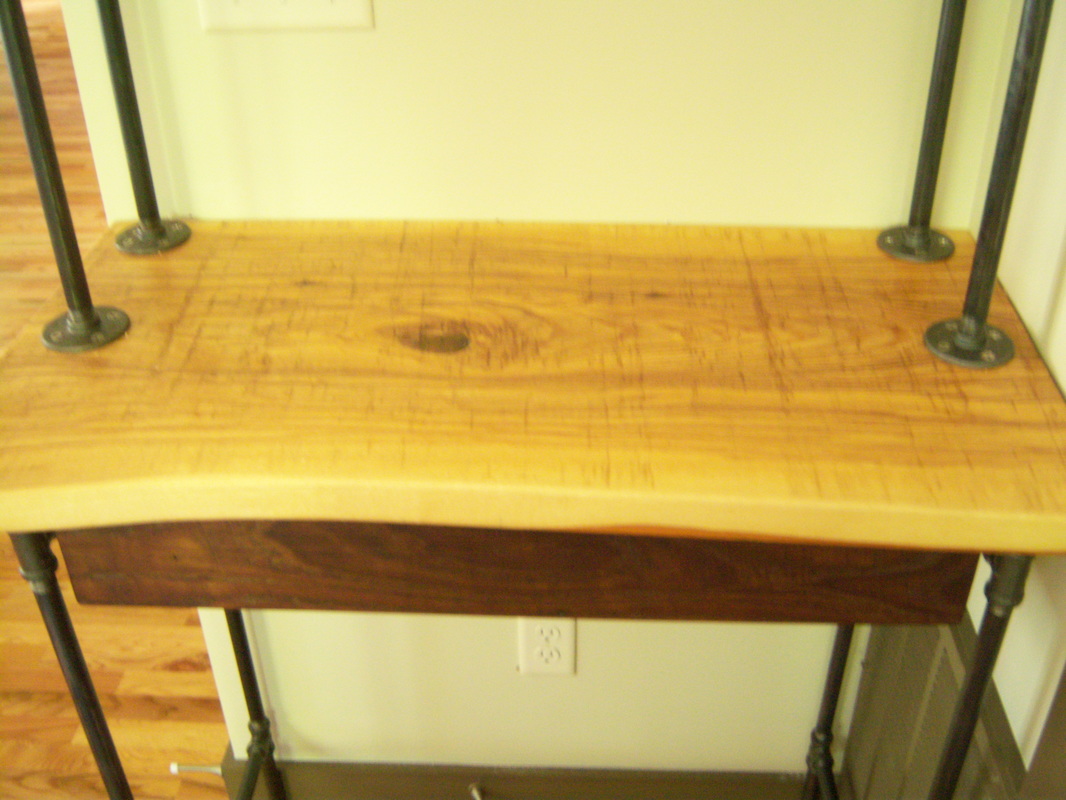
I recently had the pleasure of working with Anne Willis at De La Terre Skin Care. To say that she is an entrepreneur is something of an understatement; she takes holistic skin care to a whole new level.  De La Terre Skincare is featured in several hospitals and holistic medical clinics, where the products have been approved and accepted by physicians. The company packaging reflects the integrity and care that goes into each formula. With that in mind, she ordered a set of display furniture for her showroom. Of course, when it comes to buying furniture online, there's a big difference between what you see and what you get.
Fortunately, I love to assemble furniture. (It's like a puzzle.) First I reviewed the directions carefully and laid all of the pieces out. Then I assembled the shelves on the floor per the instructions. When they were finished, we carefully tipped them up against the wall. Voila!
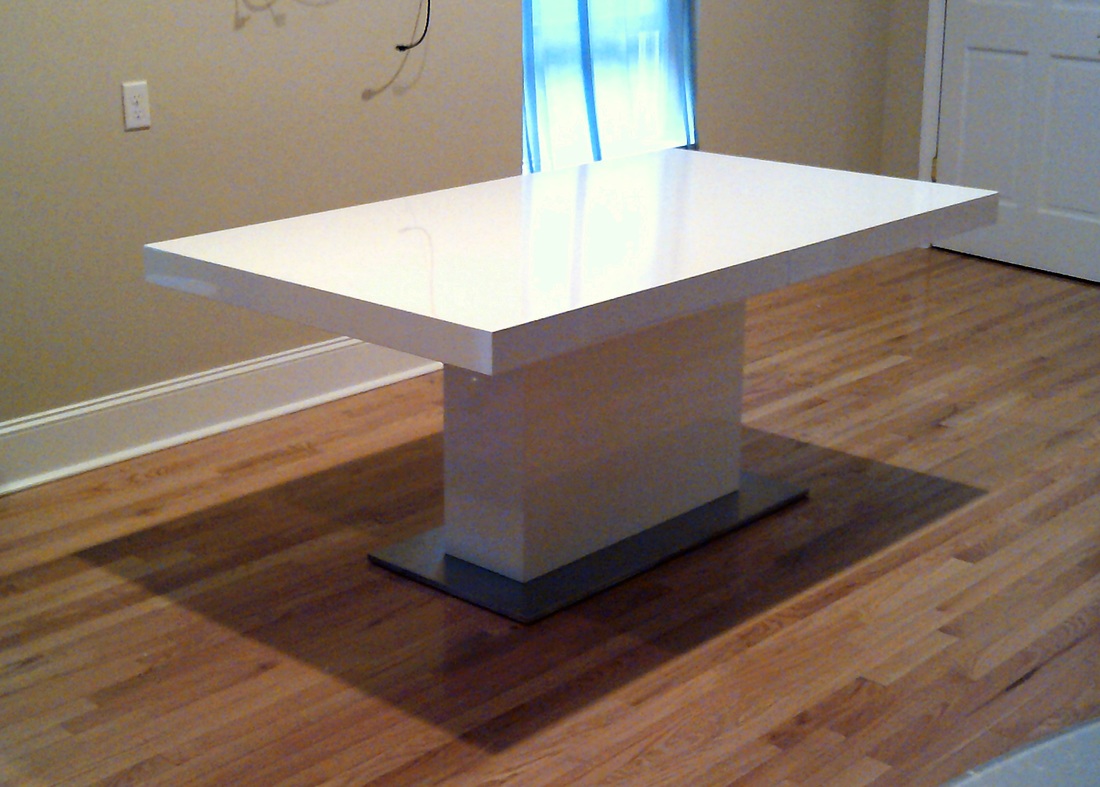
De La Terre Skincare offers workshops where they teach attendees to care for their skin, so Anne also had me assemble a large conference table where they can gather to discuss the treatments. It all turned out beautifully. The clean lines of the furniture she chose will set off the products well, and it looks good with the warm tones of the room.
Do you need help assembling a piece of furniture? If you live in Asheville or Weaverville, give me a call. I'll be glad to help. Photos of herbs courtesy of De La Terre Skincare Product photo of shelves from Houzz.com; click here to shop Keep Reading
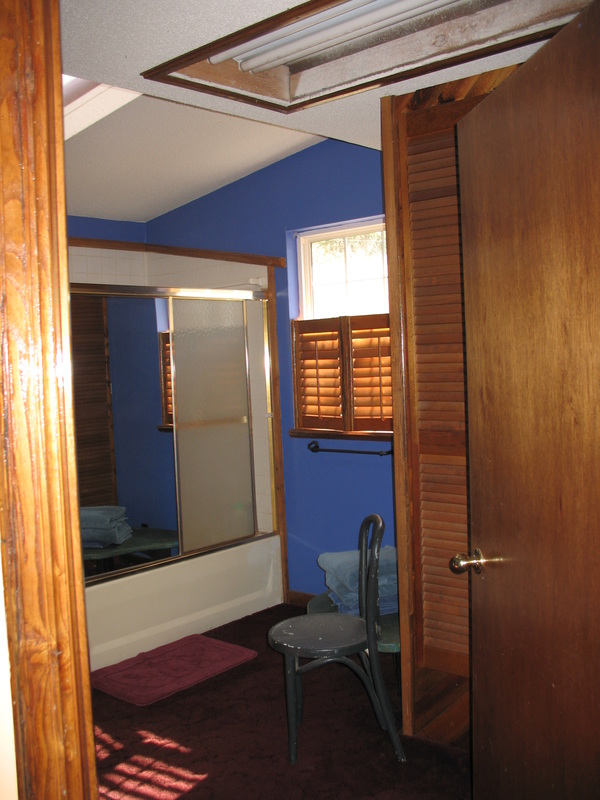
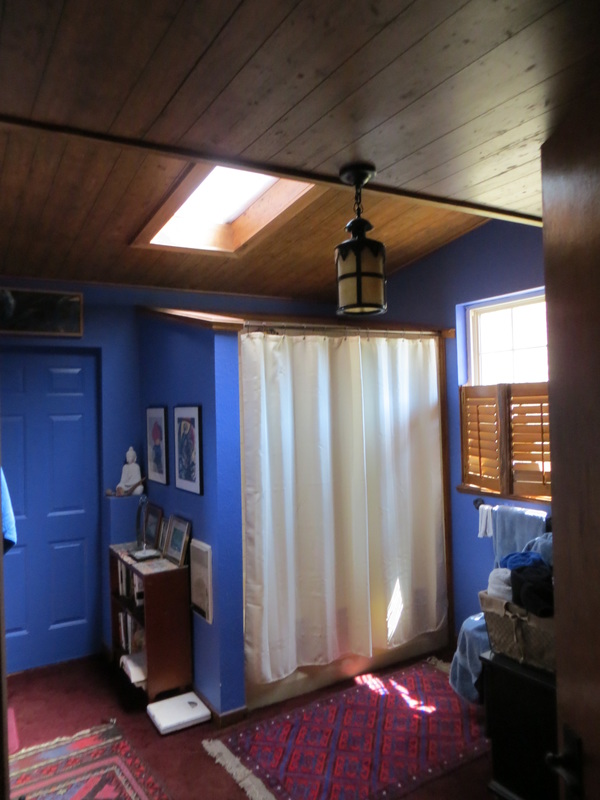
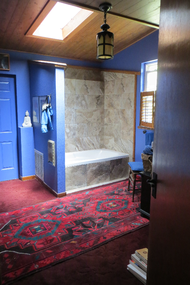
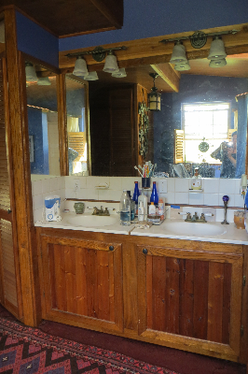
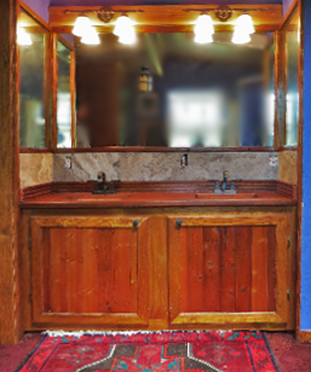
Awhile back I showed how one of my clients renovated her kitchen on a budget. Her strategy is to do one project at a time as her budget allows. She recently finished her bathroom renovation, and I thought I would share pictures of some of the stages.
Unfortunately I don't have a picture of the bathroom when she bought the house, but her first step was the least expensive: adding a bold blue paint color to set off the woodwork. Next, she had me panel over the popcorn ceiling and swap out the light fixture. At that point, we also took out the horrible sliding shower door. Finally, she brought in a tile specialist to retile the tub area. A beautiful vintage rug was the finishing touch.
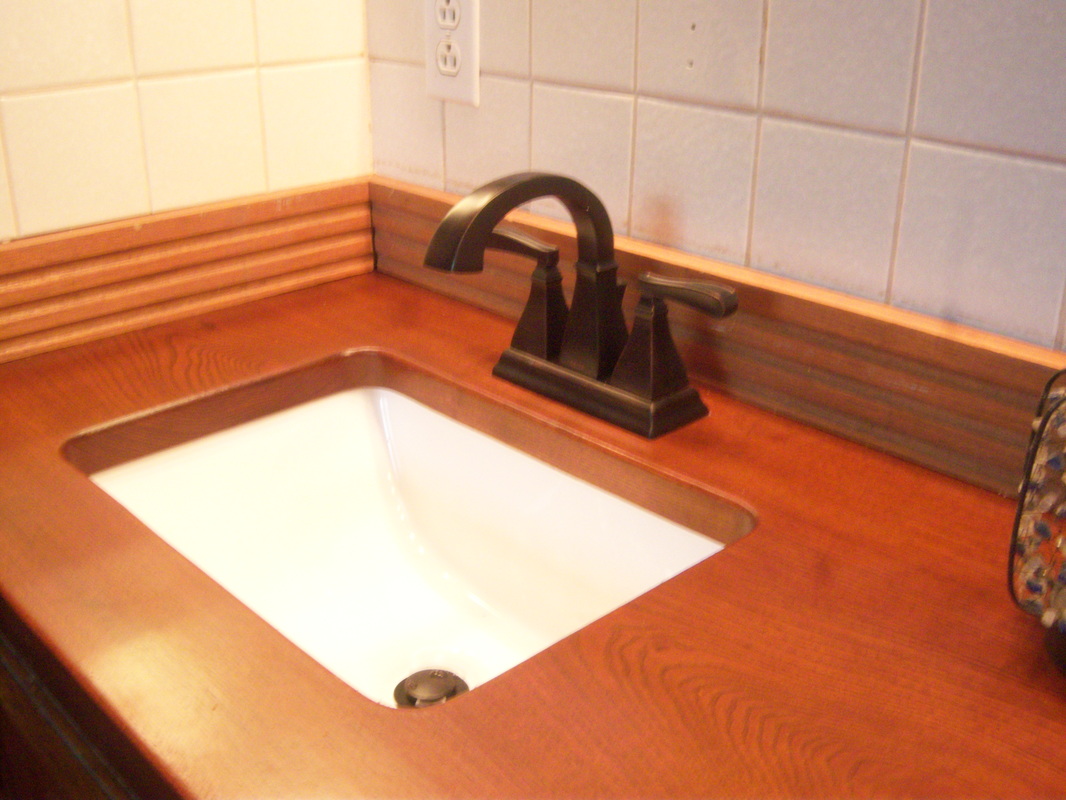
You probably remember the custom wooden bathroom vanity counter which I made and installed for her a few months ago. We had also swapped out the sinks, faucets and light fixtures. When the tile guys came in to retile the bathtub surround, they also put in a few tiles around the sink. I returned to install a little trim around the sink and mirror for a built-in look. In pictures, it looks like this renovation happened overnight, but this took place over the space of about five years. It goes to show that with patience and planning, you can have a beautiful home on any budget. Does your bathroom need a little TLC? Get in touch... I'll be glad to help. Keep Reading
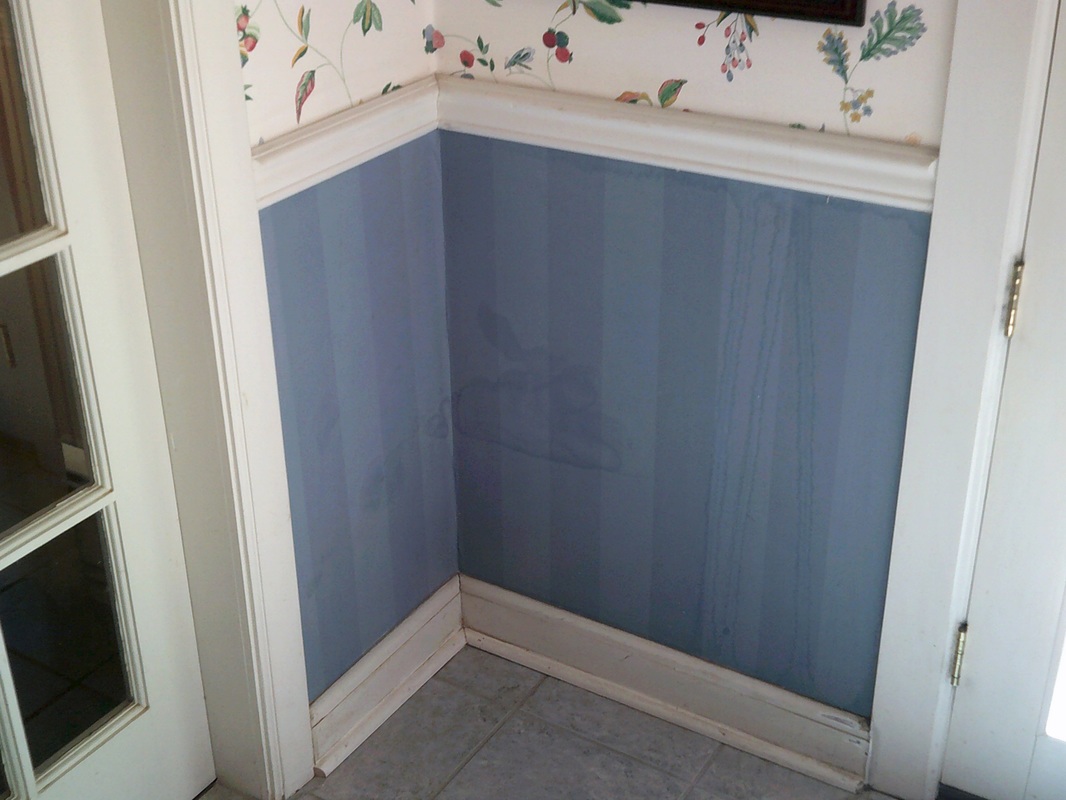
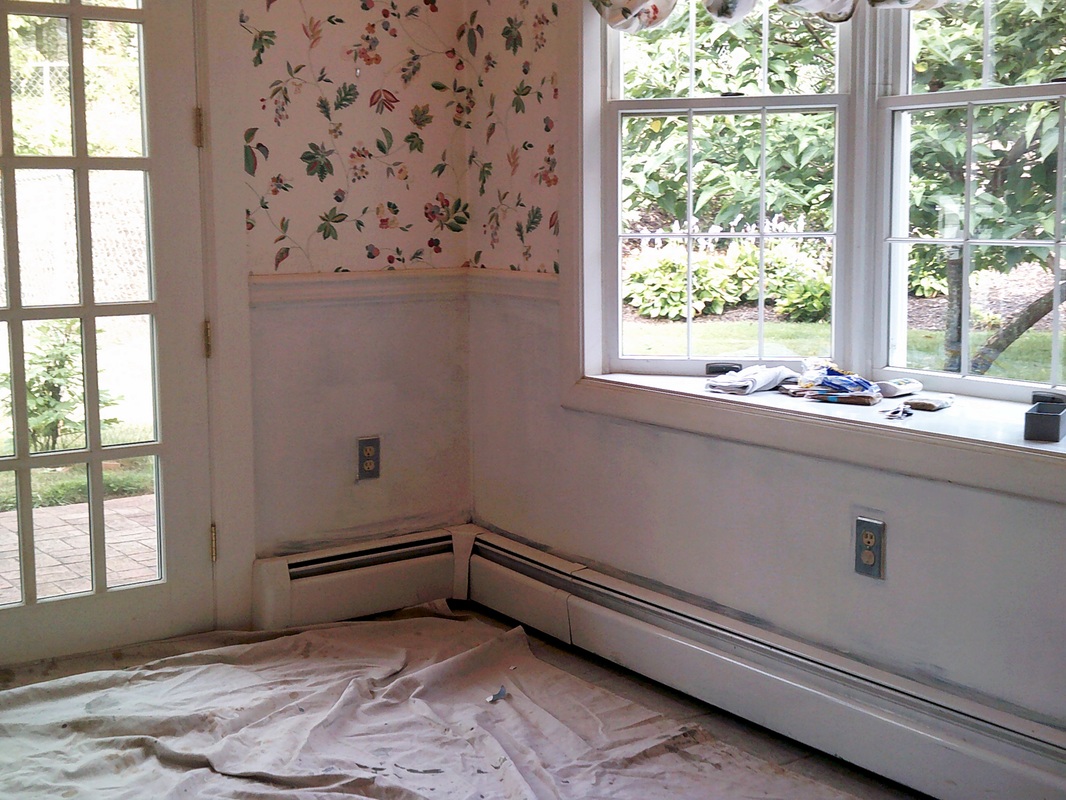
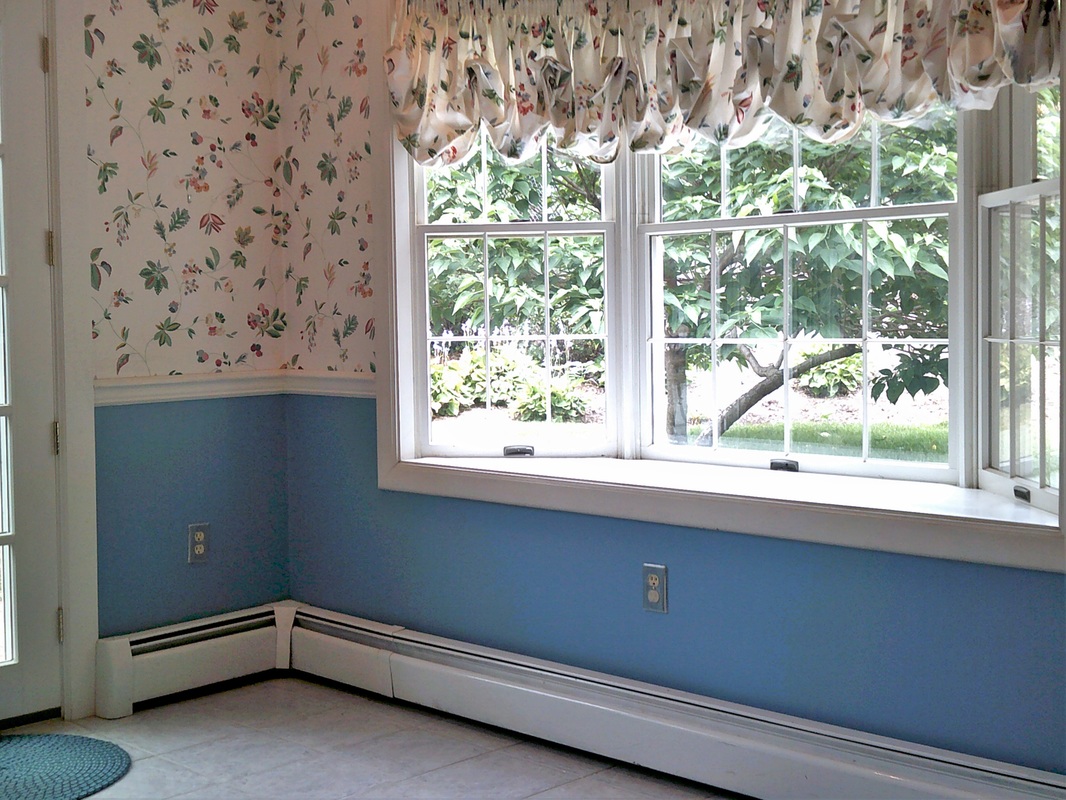
I like to joke that the only thing worse than hanging wallpaper is removing it. Even if you manage to peel most of it away, there are usually spots where the paper just won't let go and you have to patch over the frayed edges. Fortunately, it's possible to paint over your wallpaper without removing it... as long as you do it right. In this example, my clients Mike and Anne had some stains in their wallpaper as the result of a roof leak. The water dripped down from a light fixture in the ceiling and onto the blue panels below the chair rail. They wanted the blue area painted over in the same color.
Step One: Check for any loose paper and re-glue it. Step Two: Caulk all the edges to further glue and seal it in place. Step Three: Prime the wall paper with oil-based primer. This keeps the water-based latex paint from softening the wallpaper glue. It's very important, so don't skip this step!
Step Four: Top coat with the color of your choice.
Painting over old wallpaper is possible if you're careful and follow all of the right steps. On the other hand, if you live in the Asheville or Weaverville area and you'd rather let a pro do it for you, please get in touch. I'll be glad to help. Keep Reading
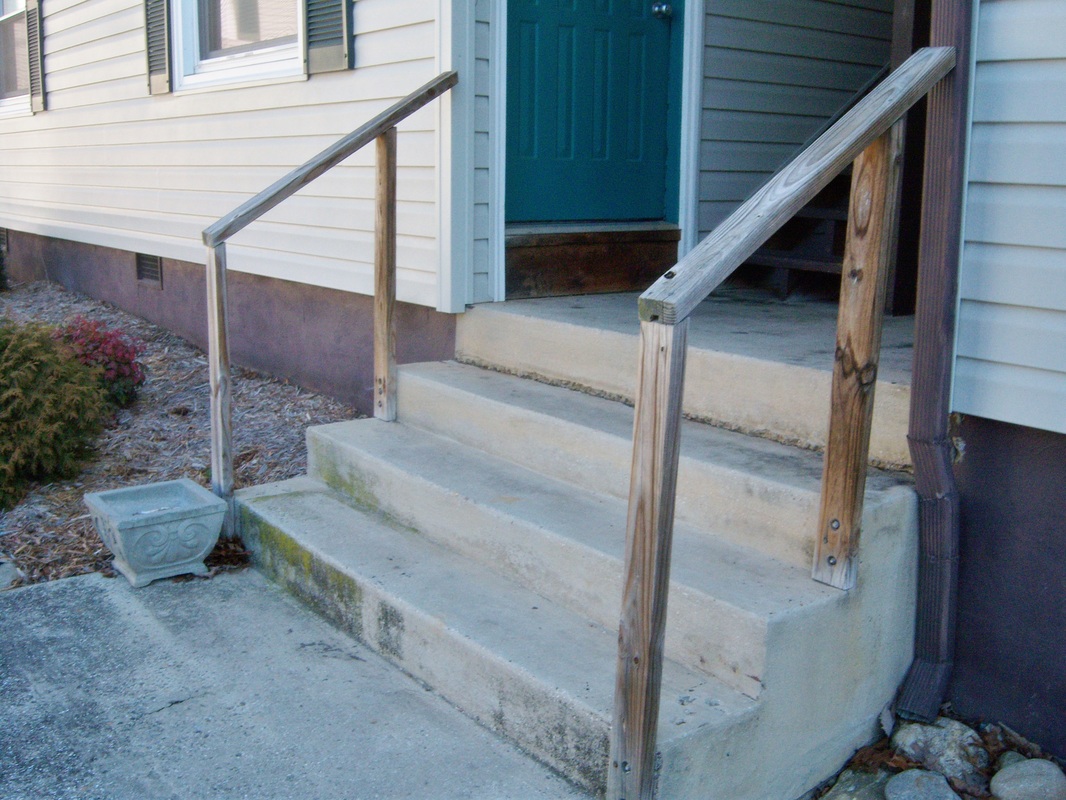
At first my client and I thought this banister just needed a little TLC... 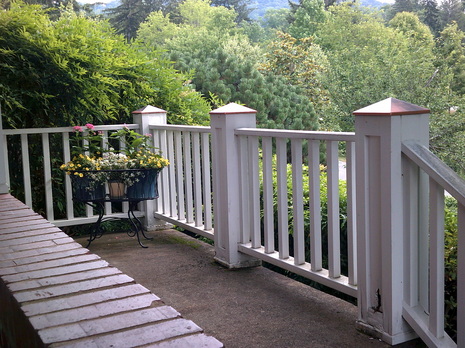 But within a few minutes, we discovered that it needed to be completely replaced:
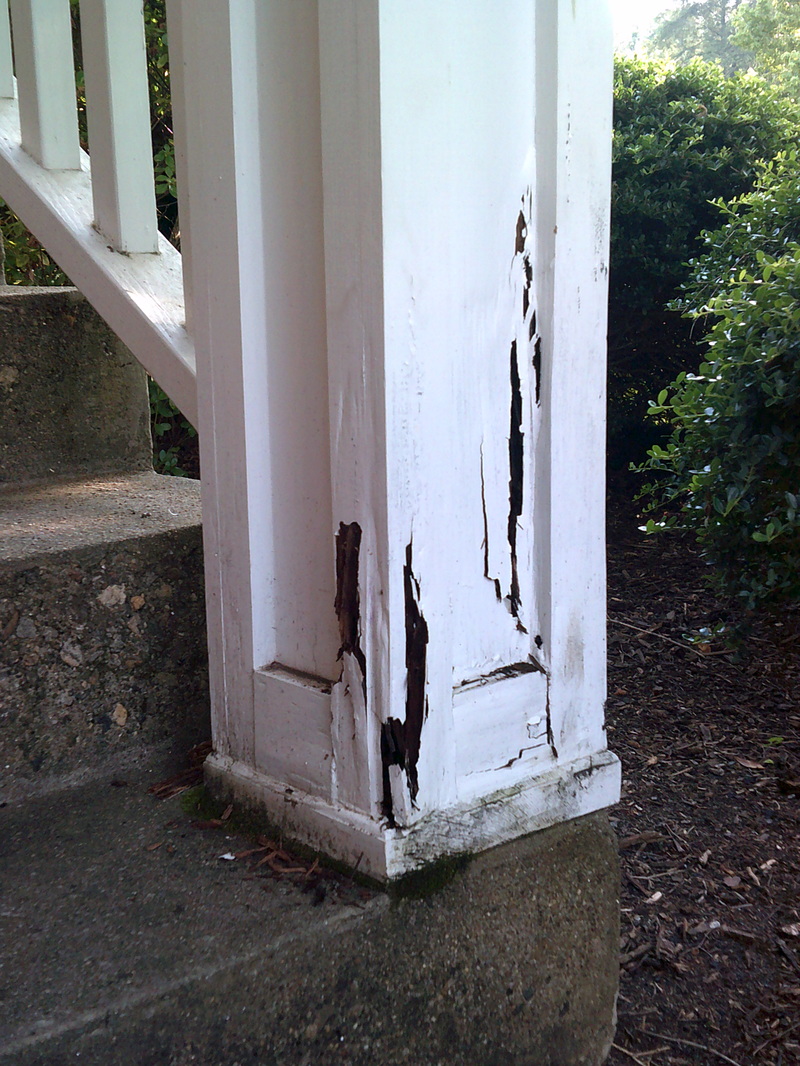
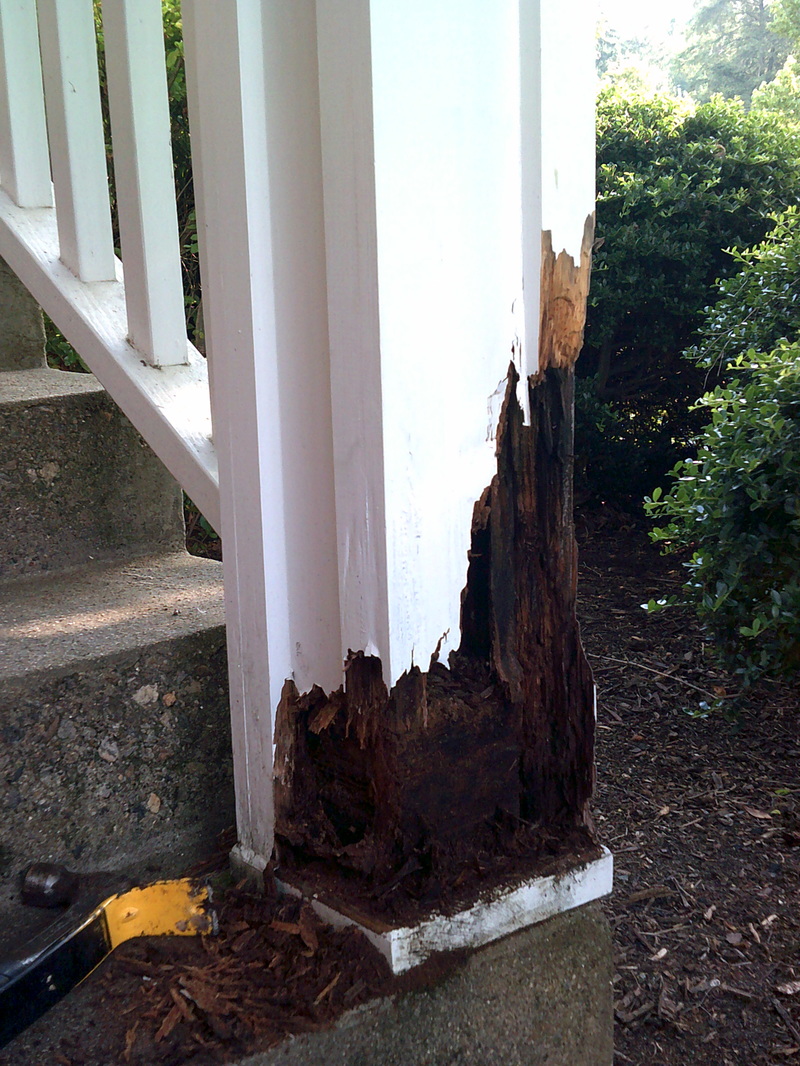
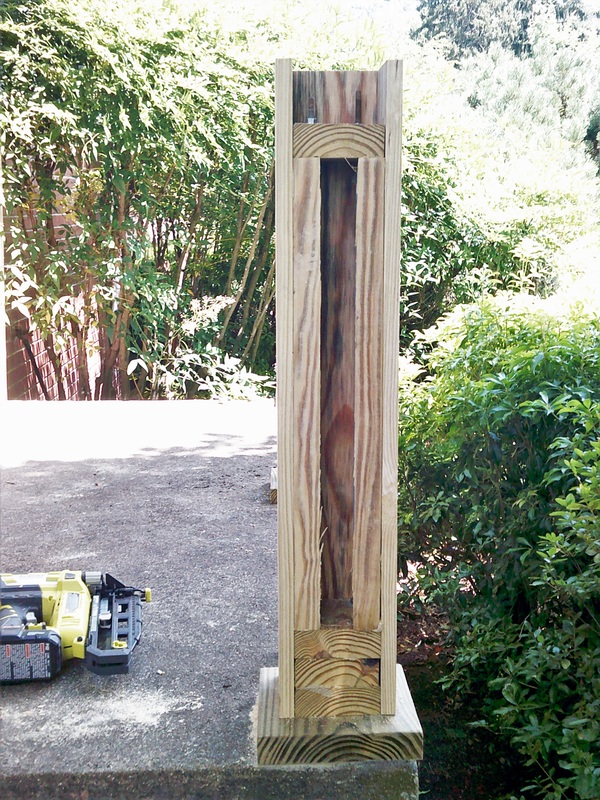
Whoever built this used untreated lumber, and the concrete stairs were wicking water into the wood and rotting it. The wood was basically just compost held together by a coat of paint. Luckily that made it easy to remove, and I soon had it chiseled out. 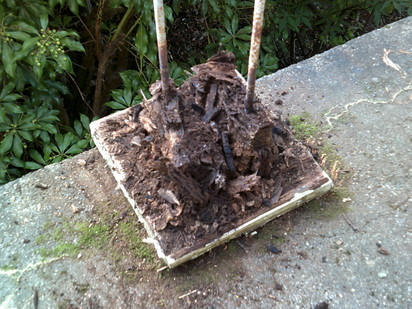 Once the banister was removed, we were left with these galvanized threaded rods, which were fortunately in great shape to re-use! 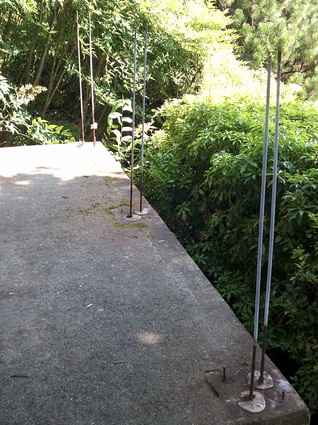 If you think about it, building a wooden railing on concrete steps poses a major problem: how do you attach the railings to the concrete? Despite his oversight in using untreated wood, the original builder actually had a very sturdy and ingenious design for these railings. He started with galvanized threaded rods drilled and set in anchoring cement. Then he added a base-plate that was glued, bolted and screwed into the concrete floor. He built the post around the base-plate and tightened it down. I decided to copy his method, with a few improvements of my own. (For example, I used treated lumber!)
This system really does seem to work well for attaching wooden posts to a concrete floor. These posts are solid! Once the posts were finished, I installed the railings, trim and copper caps. This was an enjoyable project to do. It was a "thinking man's" carpentry, with a lot of detailed design hidden inside. I'll take some wood samples home with me to test the moisture readings. Once they reach around 15%, we'll be ready to paint. 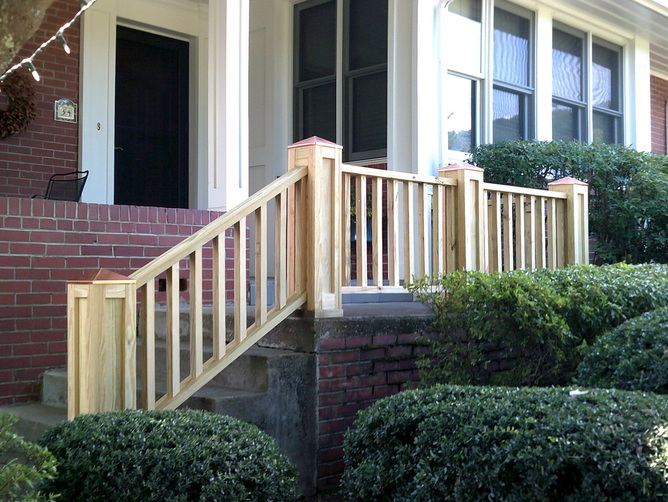 Do you need a banister or railing repaired? If so, please get in touch. I'll be glad to help. Keep Reading
|
About

Welcome to my blog! This is a chronicle of the adventures of Arthur Teel, a handyman working in Asheville and Weaverville, NC. Need someone to fix your home?
Connect!
Archives
April 2022
This blog is for entertainment purposes only. See our Terms of Use for details.
|


The current turn-around time for our interior painting team is 2 weeks.
Our handyman team is currently fully scheduled and not taking new projects.
What Our Clients Are Saying
"Arthur is that rare professional handyman who is totally reliable; fairly priced; pro-active in communications; honest; punctual; skilled -- and a really nice guy." "Arthur is a great resource to have here in our area. He's prompt, professional, does great work and is cost effective. I'll definitely use him again!" |
Follow Us:Email US AT:Service Area:
In-town Asheville
Mars Hill and Weaverville Arden and Fletcher Fairview Popular Services |

|